How to Recover Deleted & Lost Folders from USB Drive?
- Restores lost and deleted folders from all brands of removable USB flash drives, external HDD, SSD, FireWire drives, etc.
- Supports the restoration of over 300 types of files including videos, documents, pictures, audio files, PDF, HTML, XML, etc.
- It recovers USB drive files that are deleted, lost, corrupt, formatted, or reformatted.
- Allows users to preview the files restored from the USB drive storage
Have you ever accidentally formatted your USB flash drive? If you have lost some folders from your USB flash drive which contains some important business files, media files, or vital documents then you are about to find the best solution to regain USB drive files and folders. Continue reading this page...
Since USB devices are plug and play they are highly susceptible to corruption, deletion, and loss. Well, losing crucial data from your USB flash drive could be very disappointing to any user. You might have a great collection of media files and documents, but certain issues will threaten this vital data.
Some basic scenarios for loss of folders from a USB flash drive
- If the USB drive files are infected by virus or malware, files contained in the folder display weird characters. When you try to delete such folders an error message reports saying- "access denied".
- USB file system corruption
- Deletion of USB files by anti-virus program installed on the computer
- Interruptions caused whilst transferring files to/from the USB drive
- Mistakenly format and reformat operations
- USB drive errors and software conflicts
During these happenstances of data loss from the USB drive, you should simply make use of the Folder Recovery software. This versatile program is designed using the efficient algorithms that scan and extracts the USB drive data. It supports all brands and types of removable storage drives.
Why use the Folder Recovery tool?
- Does not modify the original documents: Folder Recovery is a read-only tool that scans the specified drive and returns the file without altering their original content or the file structure.
- Free of Virus/Malware/spyware: It is completely secure to run on all editions of Windows and Mac machines.
Use the Folder Recovery program to retrieve USB drive data
The Folder Recovery program is built with a deep scanning algorithm that efficiently scans the USB drive and fetches all types of file from it. It supports more than 300+ file type formats. The experts highly recommend the Folder Recovery program because it performs USB data restoration during USB corruption, deletion, format, etc. This ultimate tool can also retrieve files and folders from Windows as well as Mac OS(all latest operating systems are well-supported).
Note: Learn more about how to recover data from deleted partition in Windows 10 using the Folder Recovery application.
Significant features of Folder Recovery software:
- Identifies and recovers multiple file types including emails, documents, zip archives, videos, pictures, songs, etc.
- Can also restore folders after emptying Recycle Bin and after applying Shift-Delete on the files
- Performs file and folder recovery from system drives, external HDD, SSD, FireWire drives, iPods, etc.
- Compatible with all editions of Windows and Mac- Windows 10, 8, 7, XP, Vista, High Sierra, Sierra, El Capitan, Yosemite, Mavericks, Snow Leopard, Leopard, Mountain Lion, Lion, etc.
- Presents a preview of the files recovered from the USB drive
- Available in a demo version and technical support for any sort of assistance
Steps to retrieve lost or deleted folders from a USB drive
Step 1: Launch the tool, and connect the USB drive to the system. Now select the USB drive from which you want to recover deleted folders and hit the Scan button. If you can’t locate the drive try clicking on Can’t Find Drive? option on the bottom left corner, this will scan your system to locate the drives that weren’t listed before.
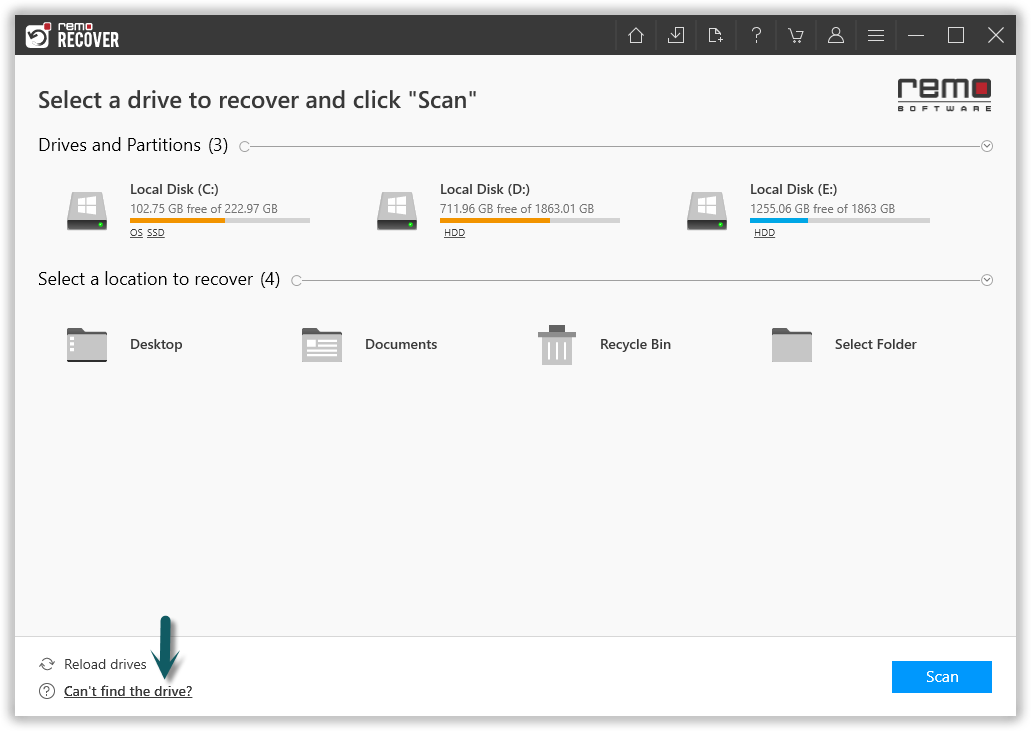
Figure 1: Select the Drive and Click Scan
Step 2: After completion of the Quick Scan process the tool will run into Deep Scan automatically and list all the folders and files in Dynamic Recovery View, Preview the recovered folders and files and verify.
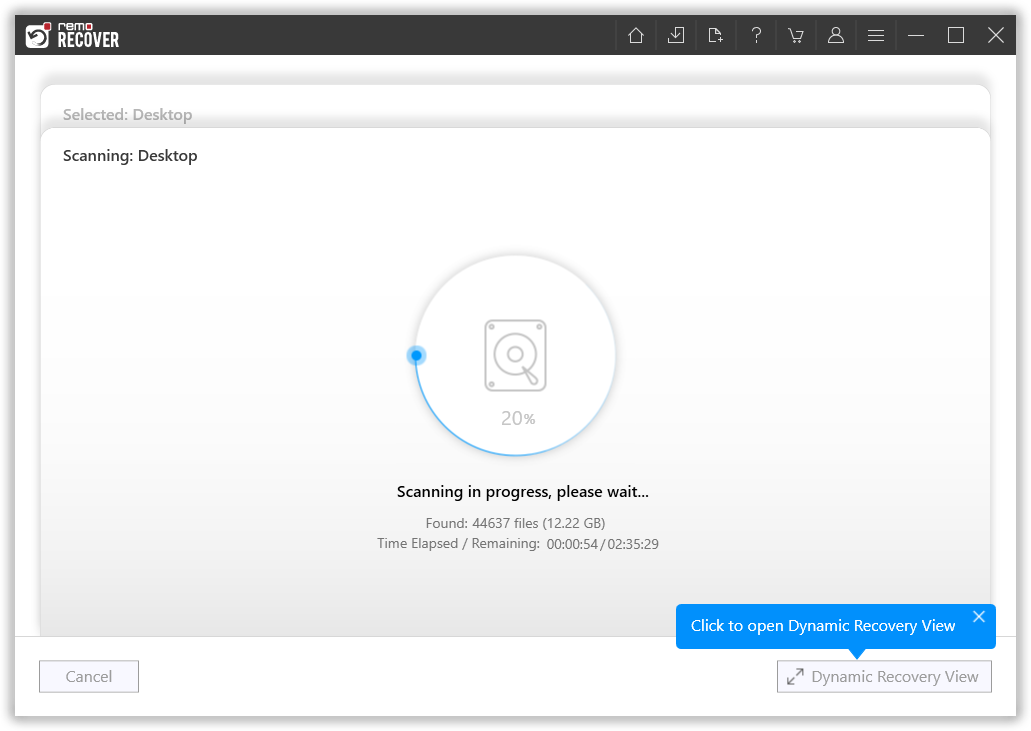
Figure 2: Scanning for Folders
Step 3: Software completes quick scan, and starts with the deep scan to recover more files. After the completion of quick scan, you can find any files you are looking for using the search bar or filters.
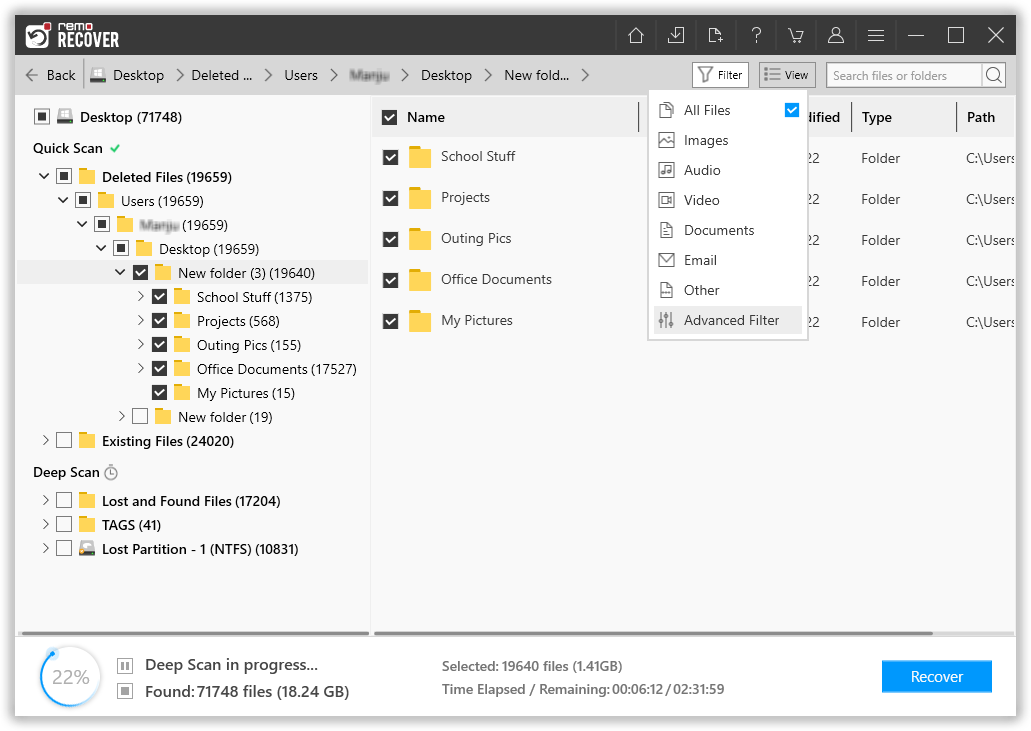
Figure 3: Recovered Files after Quick Scan
Step 4: Double click on any file to preview the files, and evaluate the recovery results.
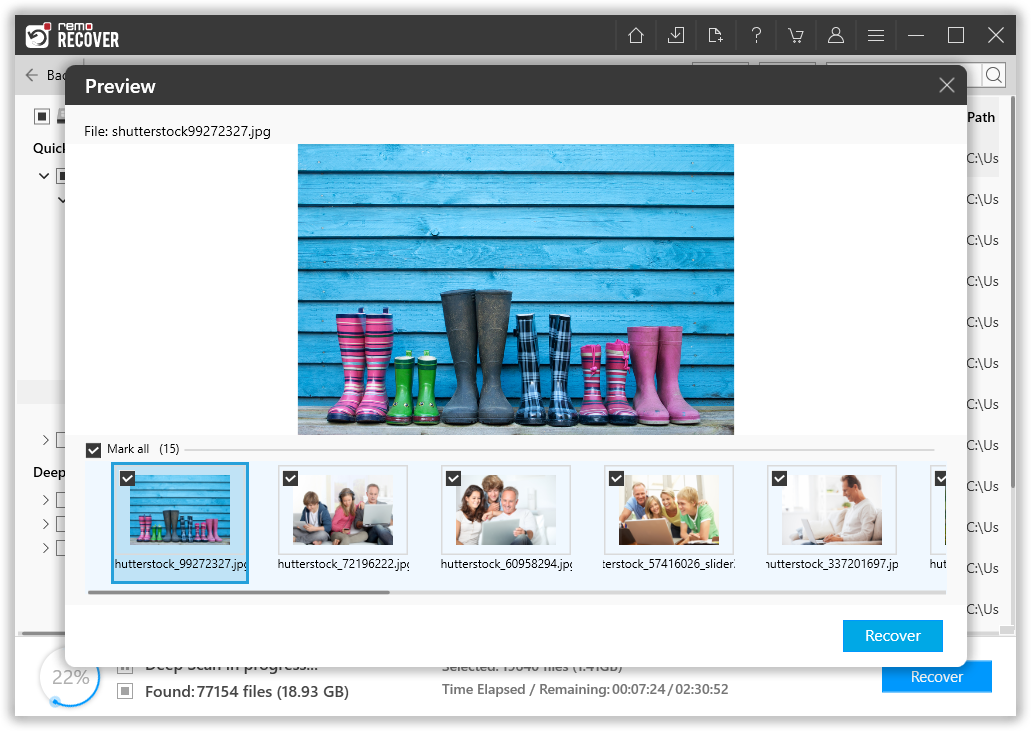
Figure 4: Preview Window
Step 5: Lastly, select a suitable destination path to save the recovered files.
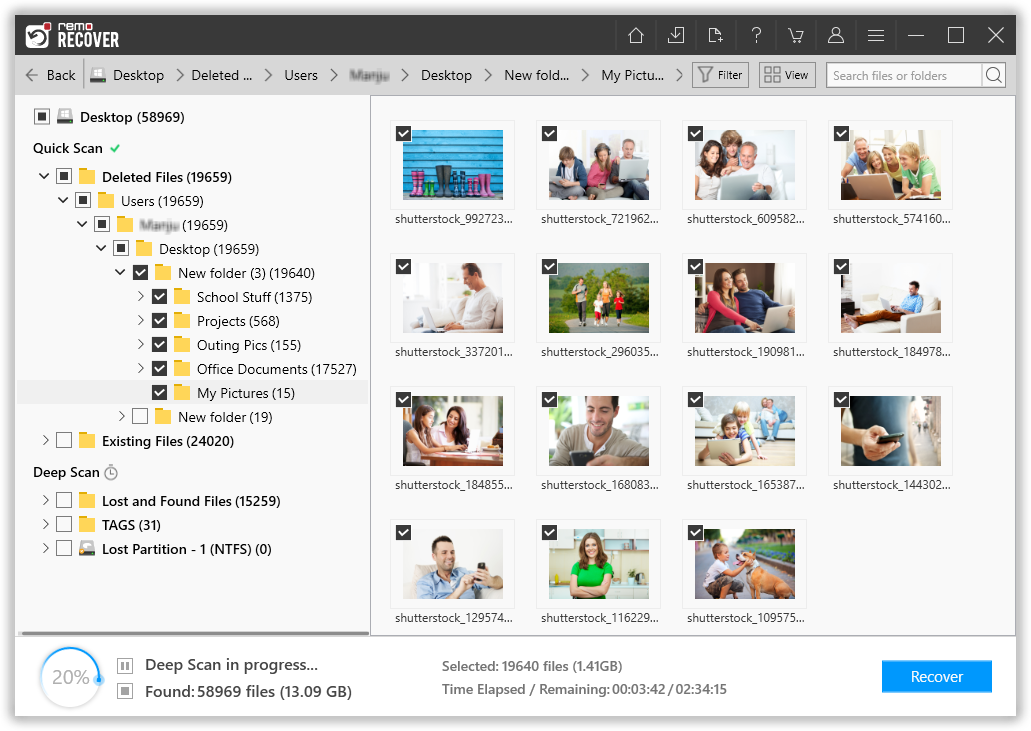
Figure 5: Save Recovered Folders