How to Recover Moved Folders?
- The files/folders lost whilst performing the cut-paste operation can be recovered using the Folder Recovery software
- Recovers more than 300 types of files that include videos, pictures, documents, audio files, PDF, HTML, .apk files, and much more
- Compatible with all storage devices including hard drives, memory cards, flash drives, SSD, and many more
- You can preview the recovered files and folders even in the demo version itself before purchasing the software
"I cut and paste a certain folder on my computer to transfer it from one partition or drive to another. But while moving folders, my system got suddenly shutdown due to a power surge. Then after some time, I turned on my system and searched for the moved folders, but I was shocked to see that the moved folders were missing from both source and destination drive. The missing folders contained some of my memorable pictures and video files, office documents, etc. So, can anyone suggest me the best way how to recover moved folders?"
Losing files or folders due to power surge is a very common scenario experienced by several users. But you don’t have to panic about how to recover moved folders. It is because the process of restoring moved folders can be easily carried out by using an excellent recovery tool called Folder Recovery.
The simplest way to restore moved files and folders
The Folder Recovery program offers the best way to retrieve moved folders that got deleted during the file transfer process. This application is inbuilt using the efficient scan algorithms that securely retrieves files and folders in a hassle-free manner. With the help of this utility, one can easily recover lost folders, deleted, corrupt, or inaccessible folders.
Let's also see how the moved folders may get deleted or lost-
- While moving folders from your system to any external storage device, if any interruption occurs like abrupt ejection of the external device then folders go missing.
- Even you may lose your moved folders if the system crashes or freezes
- Due to user mistake like while transferring or moving folders, if you cancel the transferred process, then it may result in deletion of folders.
- If you transfer folders to an infected device, then you won’t be able to access your moved folders from the drive. This leads to loss of your important files.
Whatever might the reason behind missing folders, you can make use of Folder Recovery software and regain files in a fraction of time. Along with system drives, this application is capable to extract folders from USB drives, external HDD, SSD, FireWire drives, etc. You can also read the solution to restore data from corrupt disk partitions- https://www.folderrecovery.net/files-from-corrupted-partition.html
This moved folder recovery can recover zipped files, emails, music folder, video folder, image folders, text folders, etc. The intuitive user interface helps even a novice user to recover moved folders in just a few mouse clicks. After file and folder recovery, it facilitates you to Preview the recovered folder files before saving.
Steps to restore moved folders
Step 1: Launch the tool, Select the drive from which you want to recover deleted folders and hit the Scan button. If you can’t locate the drive try clicking on Can’t Find Drive? option on the bottom left corner, this will scan your system to locate the drives that weren’t listed before.
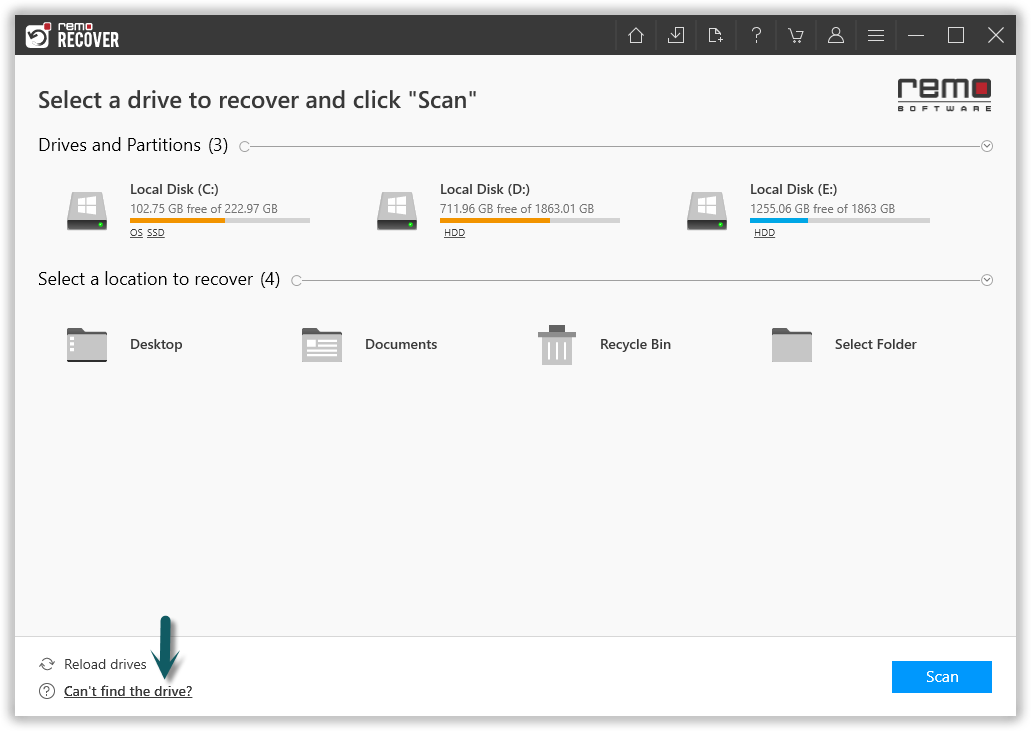
Figure 1: Select the Drive and Click Scan
Step 2: After completion of the Quick Scan process the tool will run into Deep Scan automatically and list all the folders and files in Dynamic Recovery View, Preview the recovered folders and files and verify.
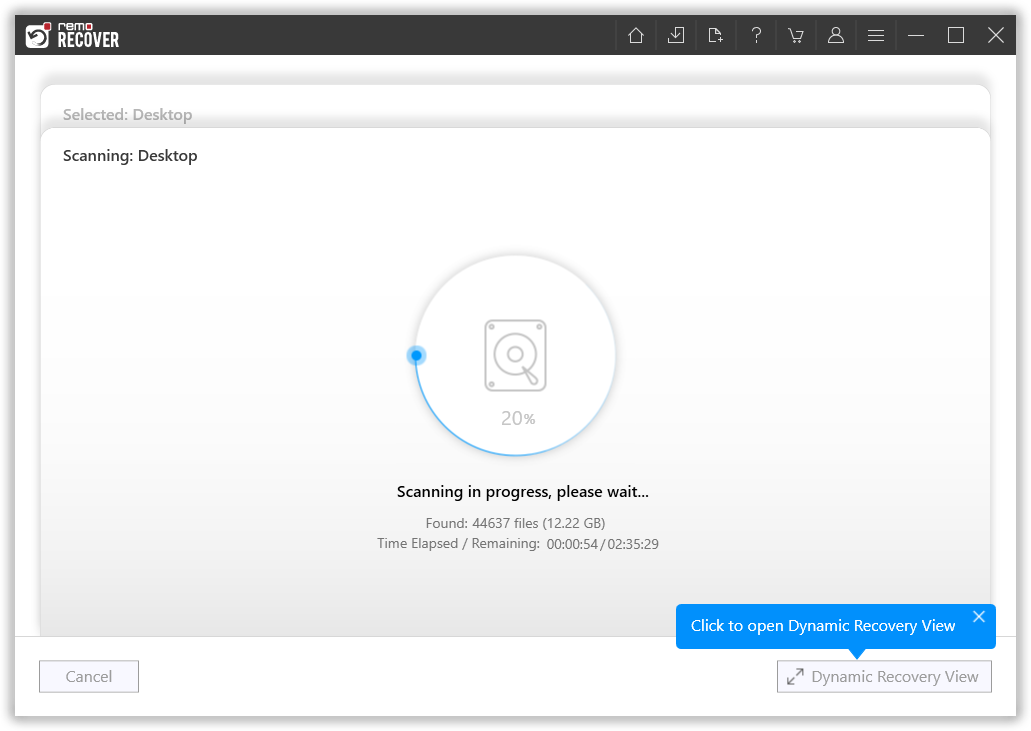
Figure 2: Scanning for Folders
Step 3: Software completes quick scan, and starts with the deep scan to recover more files. After the completion of quick scan, you can find any files you are looking for using the search bar or filters.
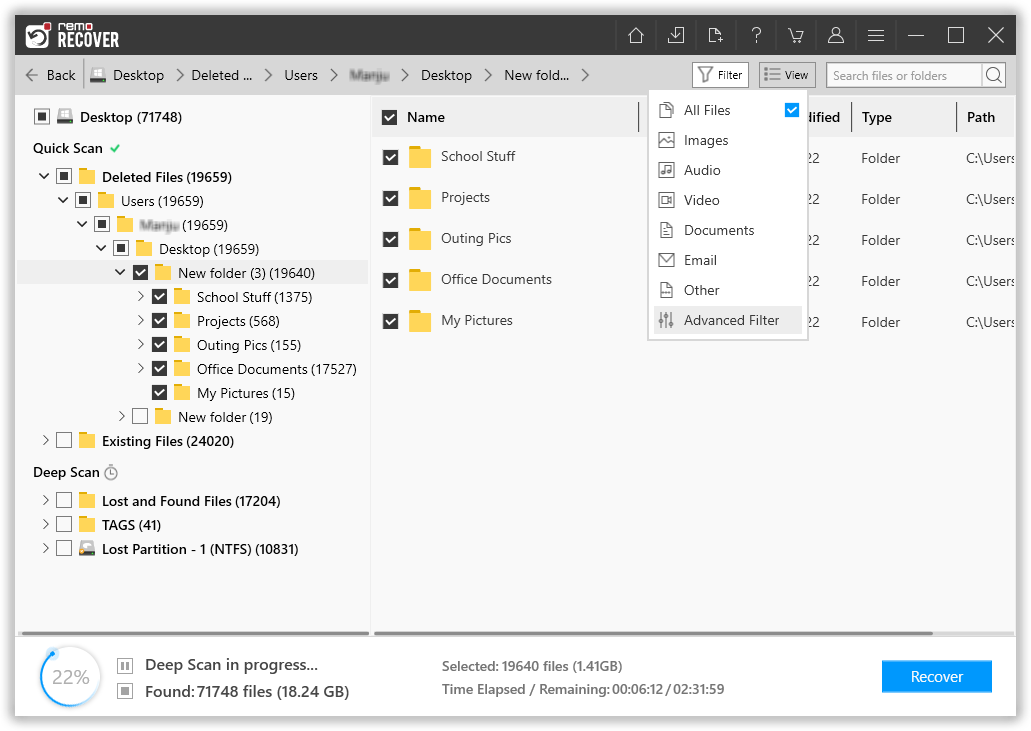
Figure 3: Recovered Files after Quick Scan
Step 4: Double click on any file to preview the files, and evaluate the recovery results.
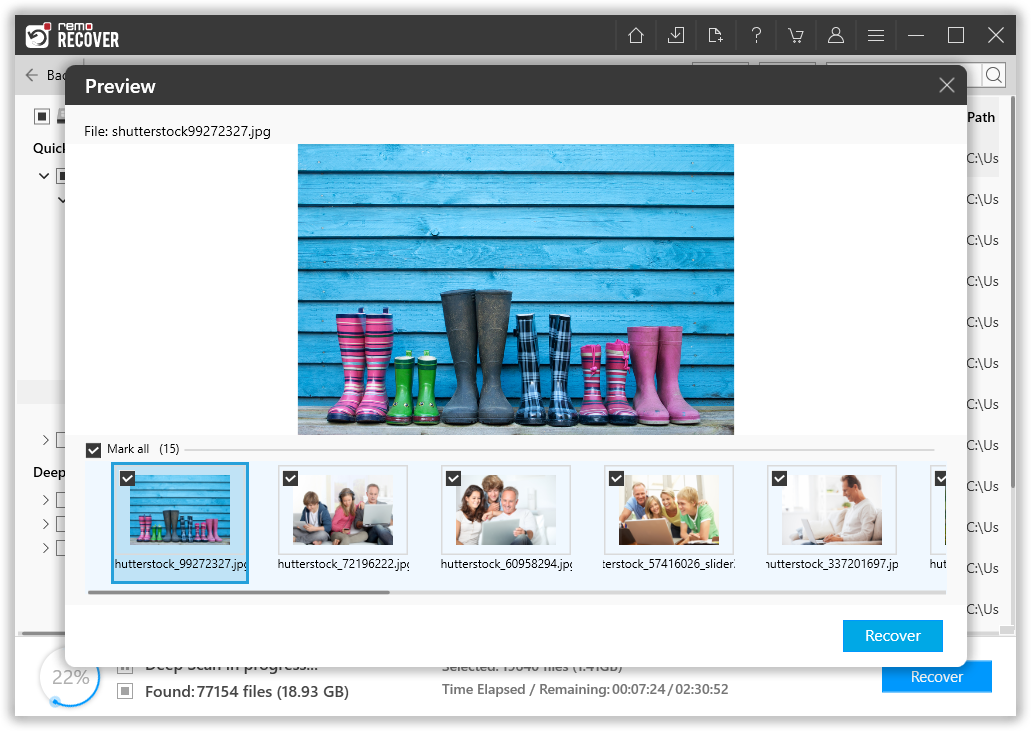
Figure 4: Preview Window
Step 5: Lastly, select a suitable destination path to save the recovered files.
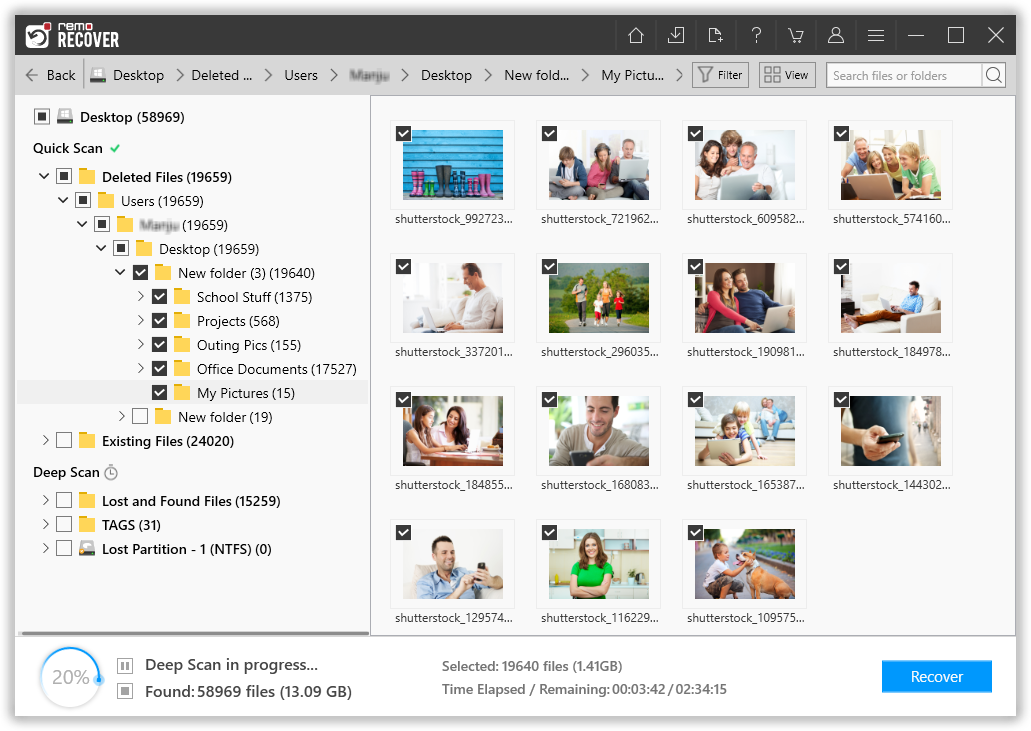
Figure 5: Save Recovered Folders