How to Recover Lost Files from My Documents?
- Deep scans the drive to recover Word files, PowerPoint files, and other MS Office files from My documents folder
- A demo version of the software is also available for free.
- In addition to text files from My documents folder, it also recovers videos, images, and other media files
- Securely retrieves My Documents folder items in their original format
- Runs on all latest editions of Windows OS
Have you lost your precious files from the My Documents folder and searching to restore all lost and deleted files? If so, this article will provide you the accurate solution to perform My Documents folder recovery. Read further, to learn more about how to restore folders on Windows systems using the Folder Recovery software.
How to get back files lost from My Documents folder?
Even if the files you lost are not visible anyhwere in the computer, it doesn't mean that they are lost permanently. The deleted or lost file items reside on the hard disk storage unless they are overwritten by new files. So upon losing your vital files from My Documents folder (or from any other folder), you need to stop using the system to store any new files.
Since the lost files are not permanently erased from the system drive, you can easily regain the lost file items by making use of the Folder Recovery software. It is built with eminent scan algorithms for secure recovery of lost files without affecting the content or structure of the original file.
Easily restore files from the My Documents folder
My Documents folder recovery application offers restoration of MS Office documents and other file formats in a quick set of steps. You can use this tool to restore deleted image folder, video folder, songs folder, email folders, zipped folders, and so on. Folder Recovery application also enables data recovery from external storage devices along with system drives. Use its trial version which is available free to check out its recovery results. Furthermore, you can recover folders from Windows 10, Windows 8, Windows 7, Windows XP, Windows Vista, Windows Server 2003, Windows Server 2008, and others.
Steps to get back lost files from the My Documents folder on Windows:
Step 1: Launch the tool, Select the drive from which you want to recover deleted folders and hit the Scan button. If you can’t locate the drive try clicking on Can’t Find Drive? option on the bottom left corner, this will scan your system to locate the drives that weren’t listed before.
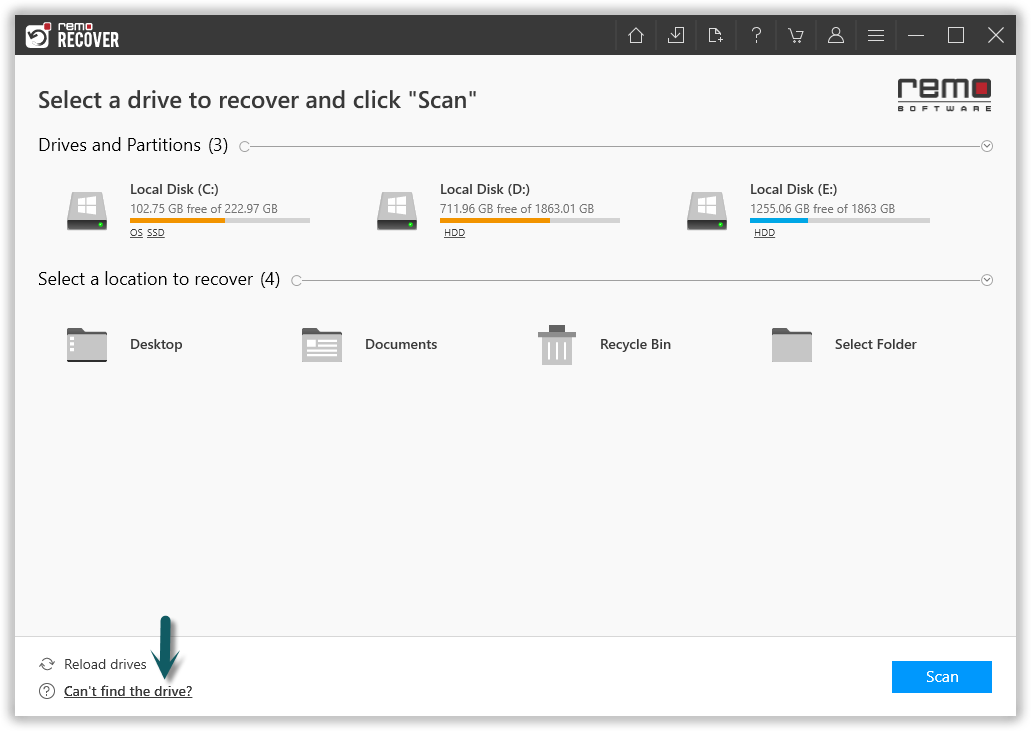
Figure 1: Select the Drive and Click Scan
Step 2: After completion of the Quick Scan process the tool will run into Deep Scan automatically and list all the folders and files in Dynamic Recovery View, Preview the recovered folders and files and verify.
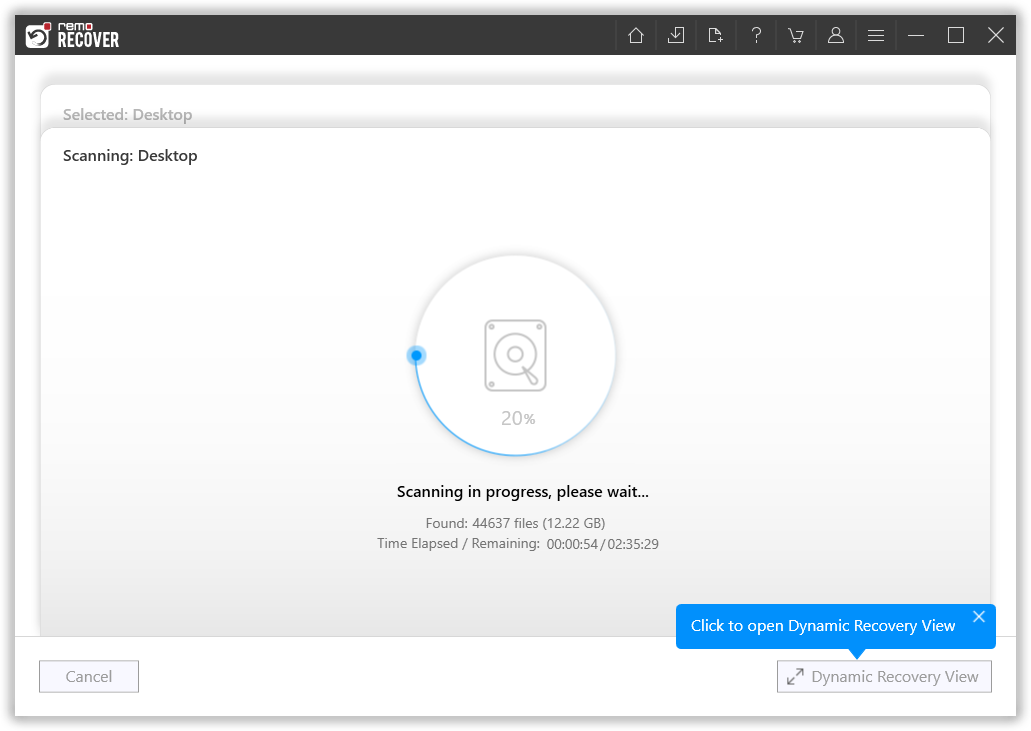
Figure 2: Scanning for Folders
Step 3: Software completes quick scan, and starts with the deep scan to recover more files. After the completion of quick scan, you can find any files you are looking for using the search bar or filters.
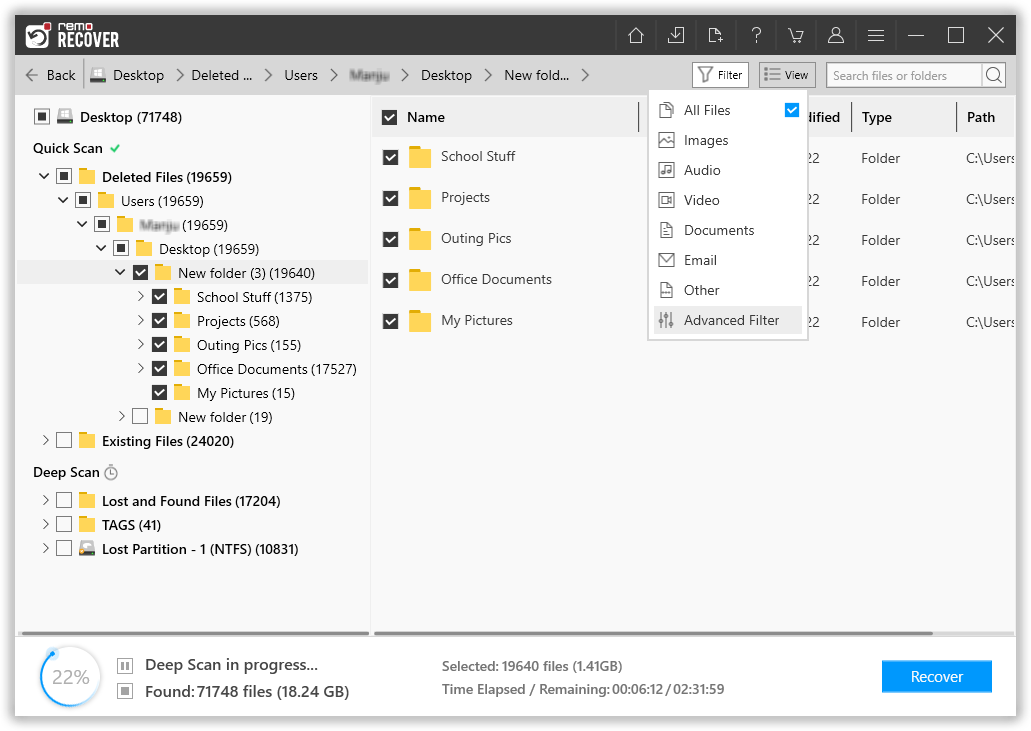
Figure 3: Recovered Files after Quick Scan
Step 4: Double click on any file to preview the files, and evaluate the recovery results.
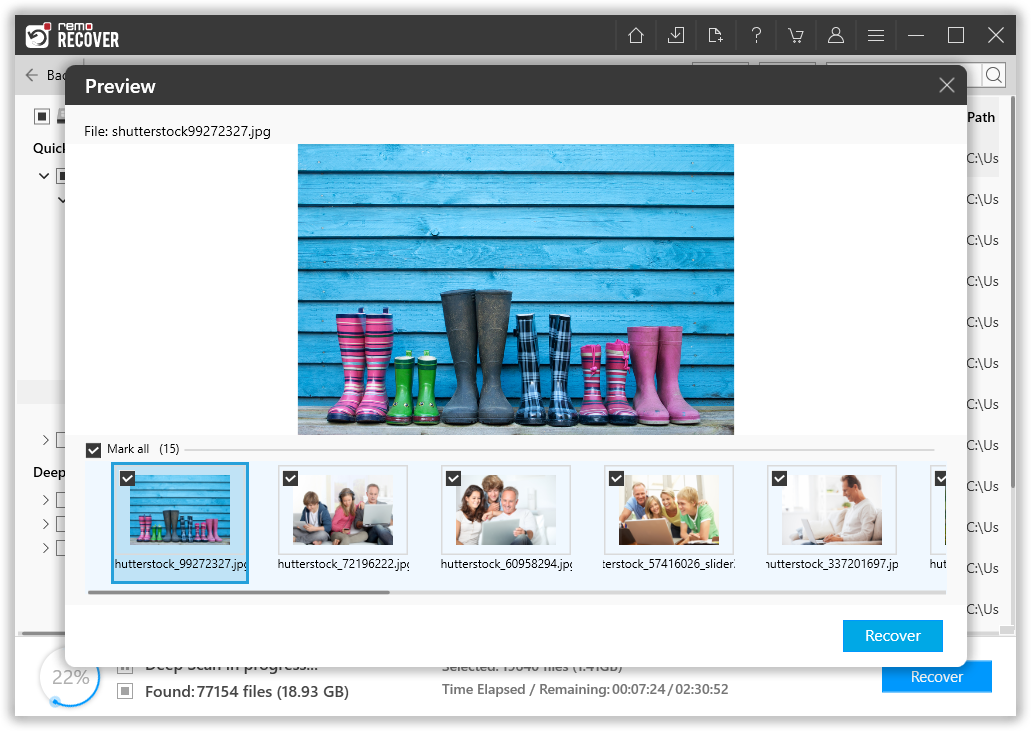
Figure 4: Preview Window
Step 5: Lastly, select the files you want to recover, and save them at your desired location.
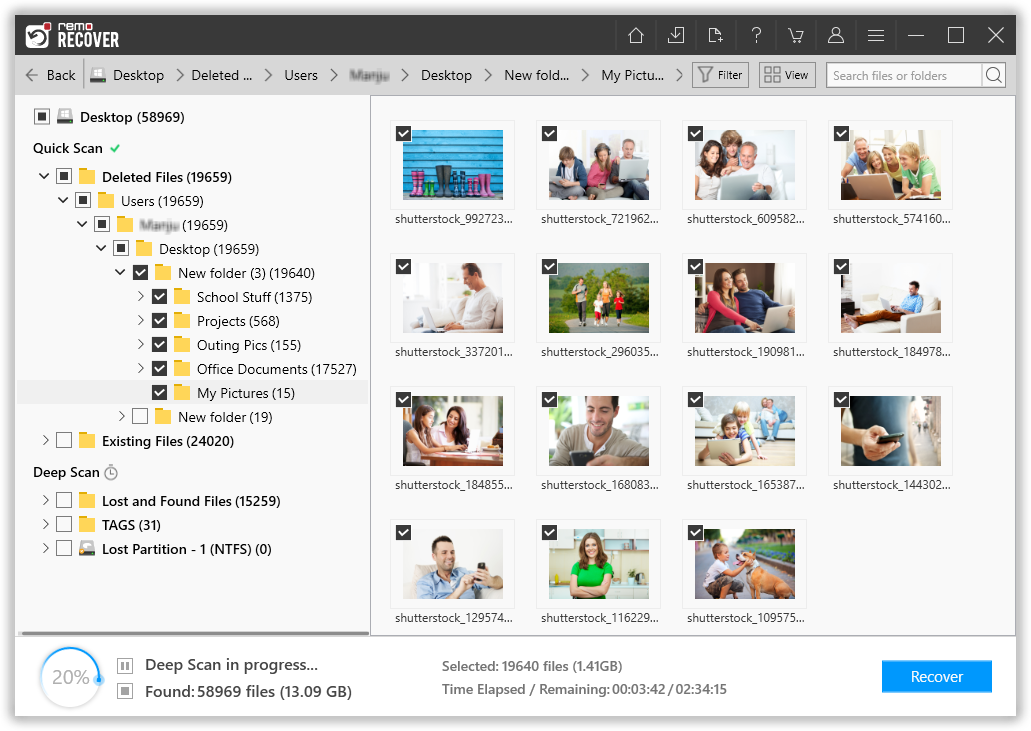
Figure 5: Save Recovered Folders