How to Get Back Deleted Folders from PC?
- Easily retrieve files and folders that are deleted after accidental deletion, shift-delete, formatting, virus infection, etc.
- Scans the PC with its advanced scanning algorithms and fetches the files effortlessly
- Apart from the internal system hard drive, it also recovers files & folders from external hard drive, flash drive, SSD, memory card, etc.
- Supports all file formats including videos, text documents, images, audio files, etc.
- Compatible with all editions of Windows and Macintosh
Have you mistakenly deleted folder consisting of important project files or ended up losing entire data from the computer? Now, desperately looking for a reliable data rescue tool to easily get back deleted data? If yes, then you can straightaway make use of an award-winning software called the Folder Recovery Tool to bring back deleted file within a short period of time.
Remember: To avoid further folder deletion avoid saving new data on your system in order to prevent overwriting of deleted data with a new one.
Undelete folders from PC with ease
To conquer any file/folder loss situations simply use this universal binary application to undelete files such as photo, audio, video, spreadsheets, presentations, emails, zip files, etc. with great ease. This software can facilitate you to retrieve files which are permanently deleted files from your system.
Note: You can also use this powerful tool to recover Outlook PST folder with ease. For more info, refer link: https://www.folderrecovery.net/pst.html.
Factors responsible for deletion of folders:
- Accidental deletion: At times, you might mistakenly choose valuable files and apply "Shift + Delete" or "Command + Shift + Delete" option. Even you might empty the Trash or the Recycle Bin folder without checking if it contained any vital files. You can know more about how to restore folder after emptying the recycle bin.
- Bypassing recycle bin: Deletion of a large-sized folder bypass recycle bin and you are left with no option to restore them.
- Files deleted using cut and paste command: Whenever you will select a particular and perform cut and paste command in order to copy the corresponding file to other location. Meanwhile, during the process any interruption occurs such as sudden power failure can delete a file from the source location.
- Usage of the third-party software: An improper way of using any third-party tool such as antivirus software might delete important folders while scanning the drive infected by the virus.
Whatsoever might be the cause for deletion of important folders from your computer, the Folder Recovery tool can bring back your folders/files in a matter of a few minutes. It is inbuilt with a highly-sophisticated algorithm that deep scans the storage to extract the deleted files.
The Folder Recovery program can also be utilized to restore deleted folders from external drives such as USB drive, memory cards, USB drives, external HDD, SSD, etc. This program can be installed on any edition of Windows and Mac OS- Windows 7, Windows 8, Windows 10, Windows XP, Windows Vista, Lion, Leopard, Snow Leopard, Yosemite, Mavericks, El Capitan, Sierra, High Sierra, etc.
Steps to get back deleted folders from computer
Step 1: Download and install this software on your computer, soon after that you will get a welcome screen with three different options. Among them click on "Recover Files" option
Step 2: Browse the drive from where the files got deleted. Press on the Scan button.
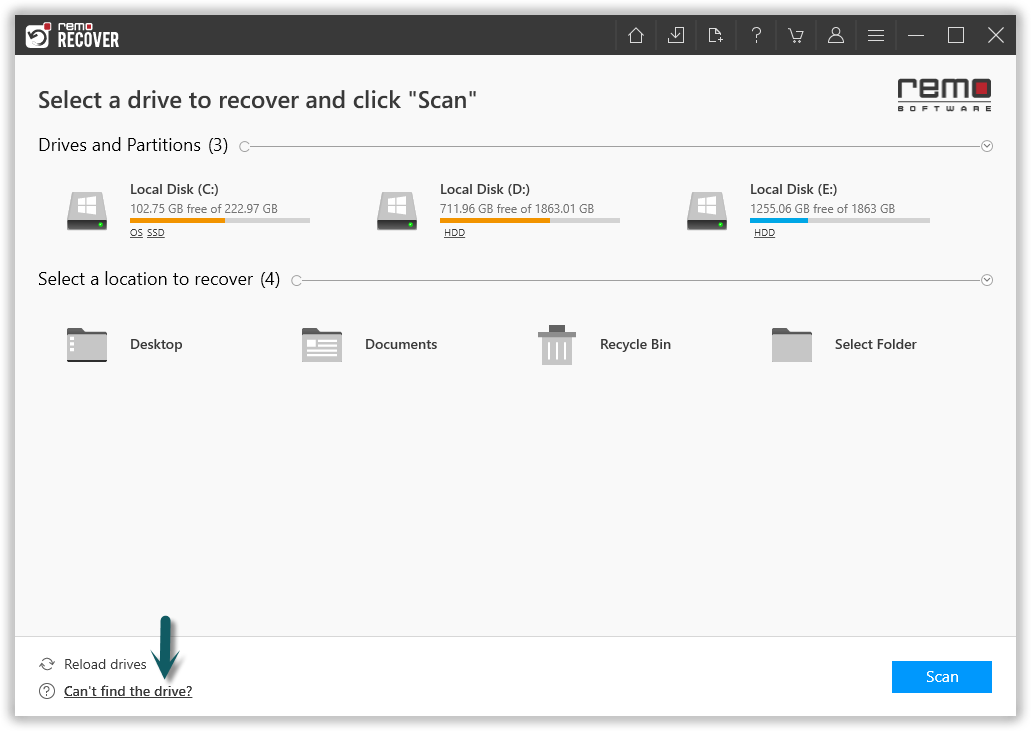
Figure 1: Recover Partitions/Drives
Step 3: The tool proceeds to scan for the deleted folders from the selected drive.
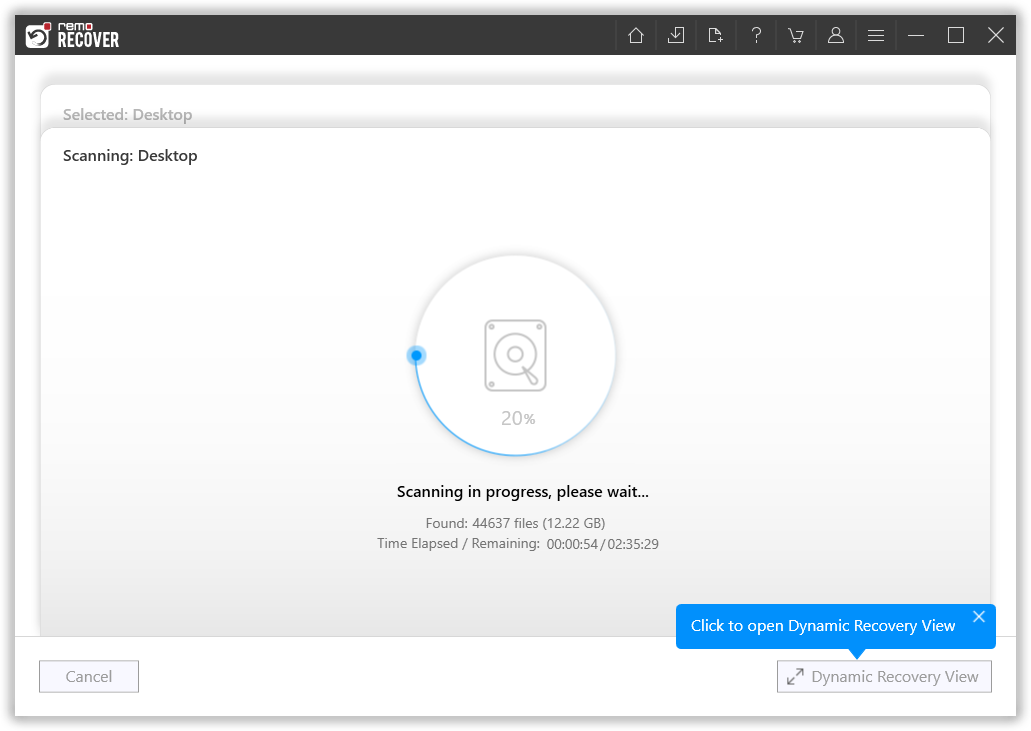
Figure 2: Scanning for Folders
Step 4: Review the recovered files in any of File Type View or Data View layouts.
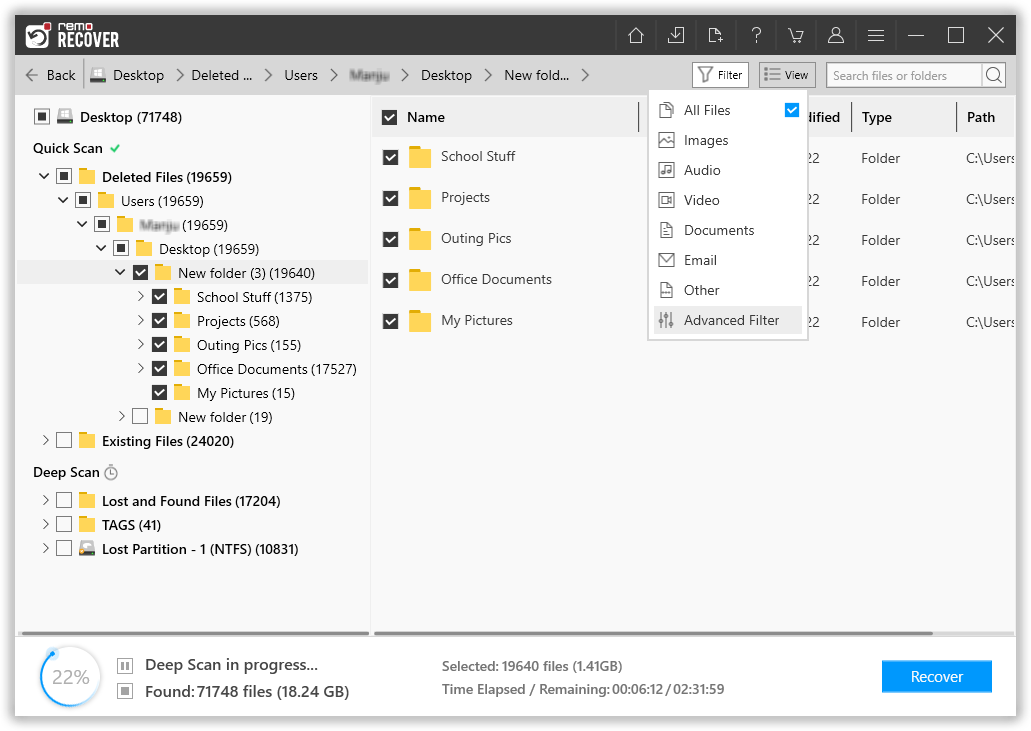
Figure 3: Recovered Folders
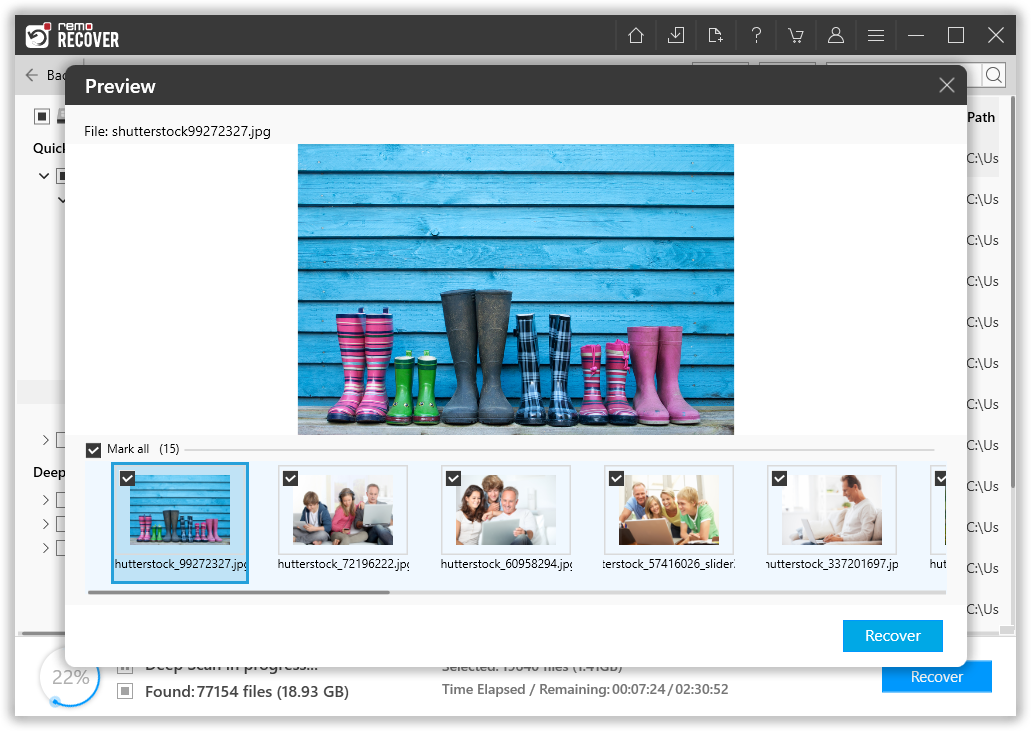
Step 5: You can preview the files with a right-click. Check-mark the file items for saving.
 m
m
Figure 4: Preview Window
Step 6: Pick a drive location to save the recovered folders from the PC. Click on the Save button.

Figure 5: Save Recovered Folders