How to Recover Deleted Folder from SD Card?
- Recovers files and folders that are lost/deleted after accidental deletion, formatting, virus infection, etc.
- Supports a wide variety of memory cards including SD, xD, CF, MMC, SDXC, SDHC, memory sticks, etc.
- Videos, photos, audio files, documents, and many other media file types can be restored with ease
- Provides a free preview of the recovered files in it's demo editon itself that helps to evaluate the software before activating
SD card is a user-friendly portable storage media, which can be used to store and transfer folders from one computer to another computer. You can store large-sized folders containing photos, videos, music or documents on a small size SD card. Similar to the hard drive, the data loss occurs in SD card also but you also got a perfect solution to perform SD card recovery. It is the Folder Recovery software that is highly competent to recover folders from SD card, regardless of the reason behind losing or erasing SD card data.
A few examples of data loss from the SD card are explained below-
- When you open video, music or any other file from your phone memory card, then it suddenly froze up. You have restarted your mobile phone but it couldn’t read the card. After connecting this card to the computer, you will come to know that the memory card is corrupted.
- If an interruption occurs whilst transferring photos from SD card to the computer then some of the pictures might disappear from the card storage.
- A complete folder of photos from camera SD card may disappear without any idea. It may happen due to virus or malware attack.
Deleted & Lost Folder Recovery is Now Made Simple
One can easily overcome data loss from the SD card storage with the help of the proficient Folder Recovery software. It is built using the sophisticated algorithms that deep scans and fetches the SD card media files in a hassle-free way. You can run this application on any edition of Windows and Mac OSX- Windows 10, 8, 7, XP, Vista, High Sierra, Sierra, El Capitan, Mavericks, Yosemite, Snow Leopard, Leopard, Mountain Lion, Lion, etc.
Upon restoring the deleted SD card files, the software sorts the revived files according to their filename, size, modified date, and creation date. You can easily track the files that you want to restore by previewing the file items. This application also helps you to recover deleted folder from your system drive, memory cards, USB drives, SSD, iPods, etc. This tool is available in the free trial version, which can be used to evaluate the result of the folder recovery operation. You can also get the make use of the “Save Recovery Session” option to save recovered files without rescanning the storage media.
Steps to recover deleted folder from SD card
Step 1: Launch the tool, Select the drive from which you want to recover deleted folders and hit the Scan button. If you can’t locate the drive try clicking on Can’t Find Drive? option on the bottom left corner, this will scan your system to locate the drives that weren’t listed before.
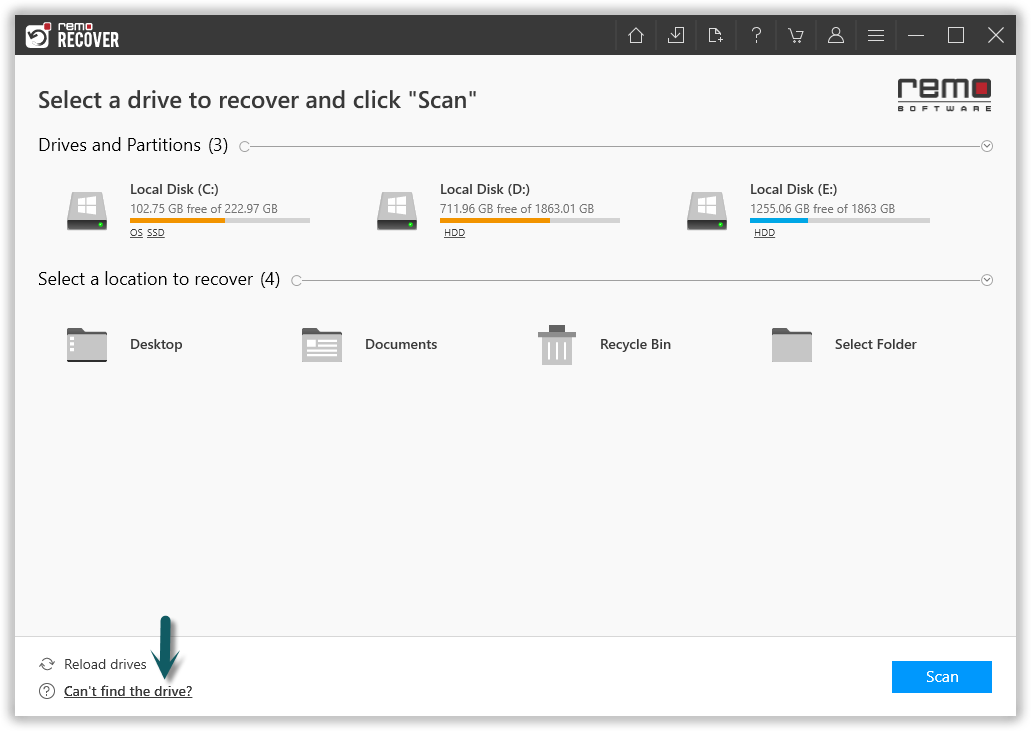
Figure 1: Select the Drive and Click Scan
Step 2: After completion of the Quick Scan process the tool will run into Deep Scan automatically and list all the folders and files in Dynamic Recovery View, Preview the recovered folders and files and verify.
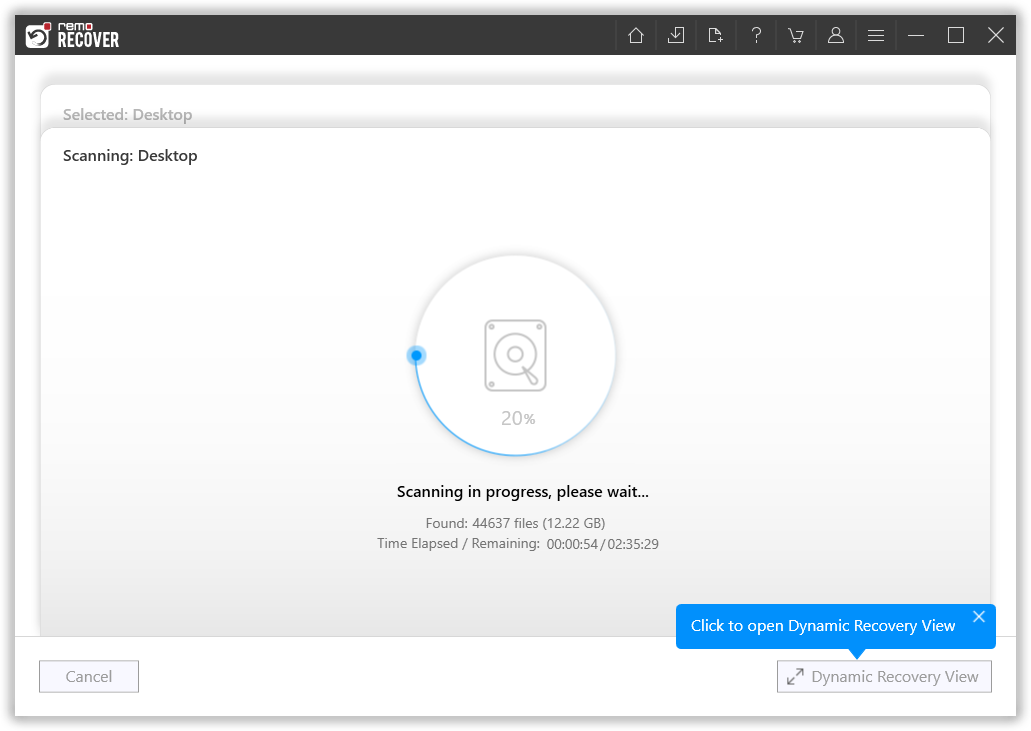
Figure 2: Scanning for Folders
Step 3: Software completes quick scan, and starts with the deep scan to recover more files. After the completion of quick scan, you can find any files you are looking for using the search bar or filters.
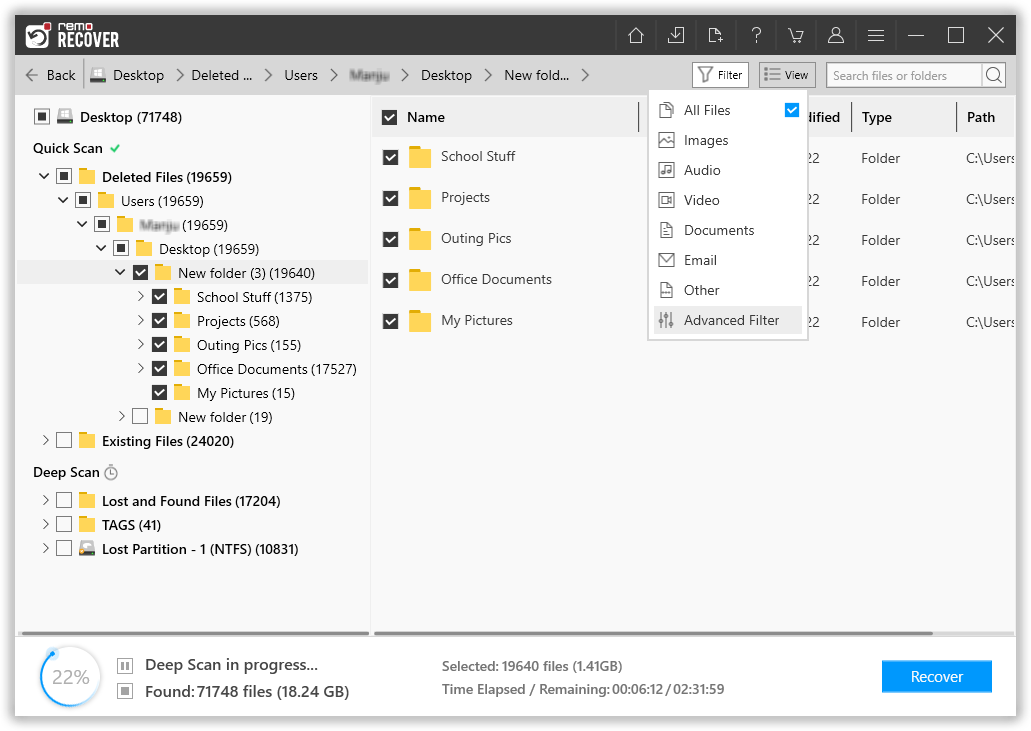
Figure 3: Recovered Files after Quick Scan
Step 4: Double click on any file to preview the files, and evaluate the recovery results.
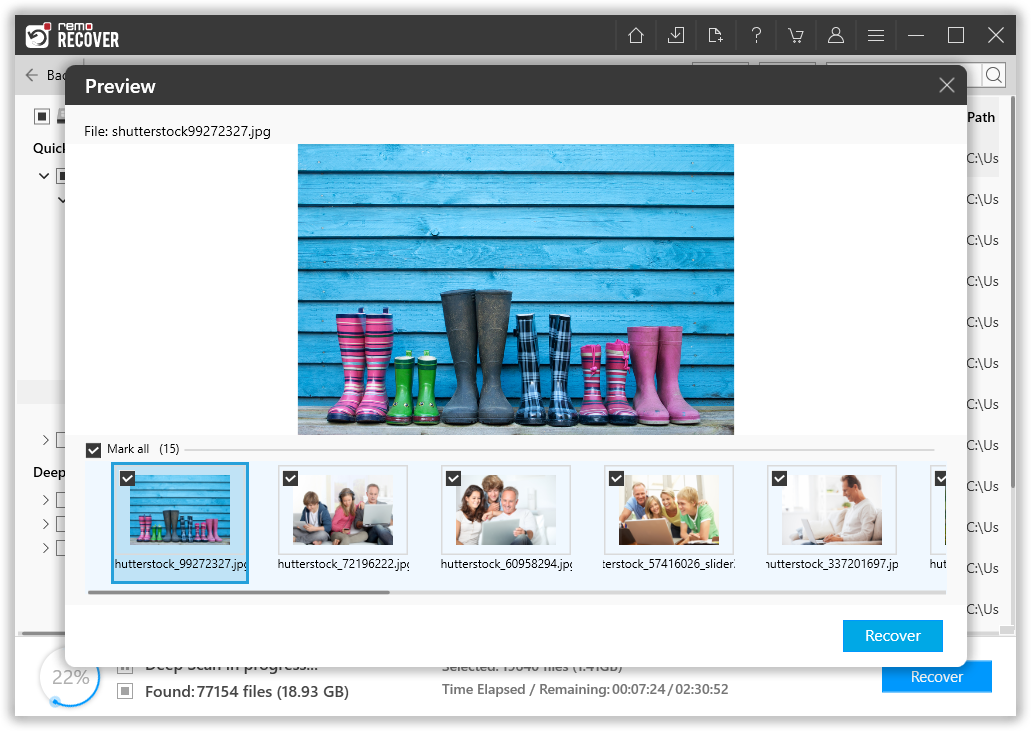
Figure 4: Preview Window
Step 5: Lastly, select a suitable destination path to save the recovered files.
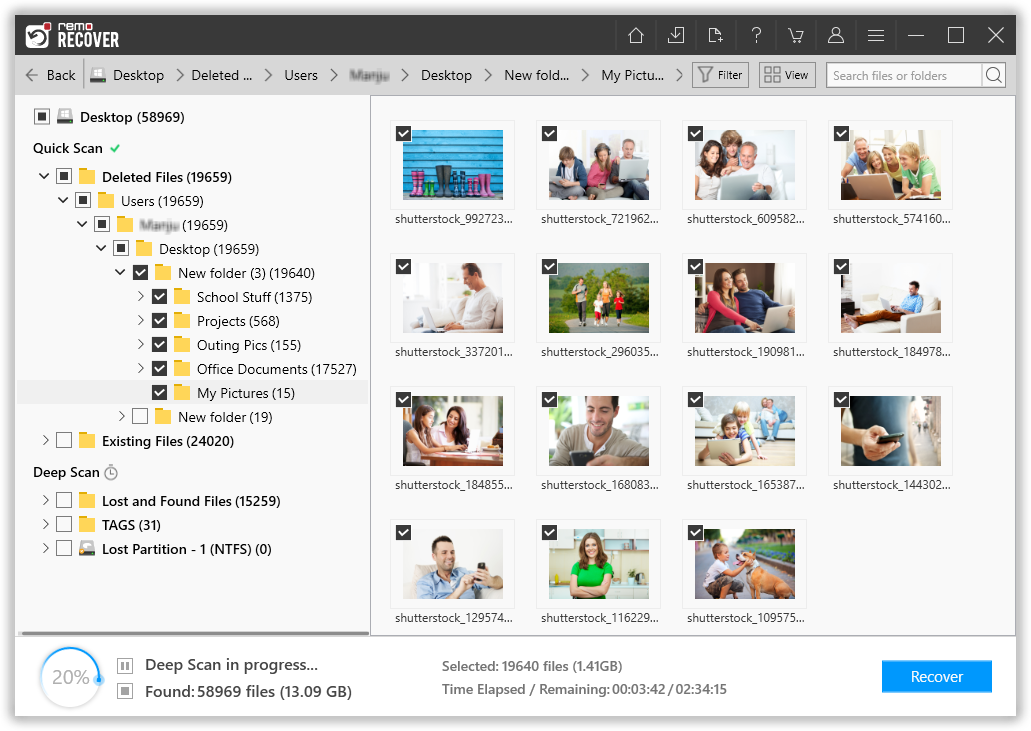
Figure 5: Save Recovered Folders