How to Recover Files & Folders Deleted From Recycle Bin?
- Files deleted from Recycle Bin, large folders that have bypassed the Recycle Bin, Shift-Deleted files, files deleted after emptying recycle bin, etc. can be restored
- Revives files using a deep scan algorithm and displays them for a preview
- All file formats of text, images, video, audio, etc. are well-supported
- Compatible with Windows 10, 8, 7, Vista, XP, Server 2003, and 2008, etc.
Have you mistakenly deleted important file or folders whilst emptying the Windows recycle bin? Now, looking out for reliable software to get back erased files from the recycle bin folder? If yes, you can straightaway restore deleted files with the help of a smart tool called Folder Recovery. With the aid of this most powerful application, you can easily bring back files like photos, audio, videos, documents, etc. deleted from the Windows Recycle Bin folder.
Scenarios wherein files & folders get deleted permanently from Windows recycle bin:
- Accidentally clearing he Recycle Bin folder: Sometimes, you might empty the recycle bin folder without verifying if it contained any important files/folders.
- Bypassing the recycle bin: If the deleted files exceeding more than or equal size of 2GB. This will result in bypassing recycle bin making files entirely deleted from the system.
- Third-party tool: If you will make use of any freeware or any third-party software might end up deleting important files and folders. This will lead to the deletion of file and folders from Recycle Bin and other drive data.
When you come across permanent deletion of files from the Recycle Bin, don't assume that the deleted files are irrecoverable. If you have lost any vital files from the Recycle Bin folder and looking for fine ways to retrieve the files then here is the best solution. In order to overcome this sort of file deletion scenario, you should utilize this highly-integrated software like Folder Recovery to securely recover folder accidentally deleted.
Use Folder Recovery tool to retrieve files deleted from Recycle Bin:
Folder Recovery is an incredible application that helps you get back deleted files from the Recycle Bin and other instances of data loss from your Windows computer. It can serve beneficial in the restoration of files and folders after applying Shift-Delete, format operation, virus infection, and many other factors.
Apart from the system drives, it can also extract data from external hard disk, USB drives, SSD, iPods, memory cards, etc. It is also capable to fetch files of any files format(supports more than 300 file type extensions). Make use of this hassle-free application to get back important file and folders in easy steps. With the help of this user-friendly software, you can readily bring back files from Windows XP, Vista, 7, 8, 10, etc. .
Steps to recover files deleted from recycle bin?
Step 1: Launch the tool, Select Recycle Bin folder option from the main menu to recover deleted folders and hit the Scan button.
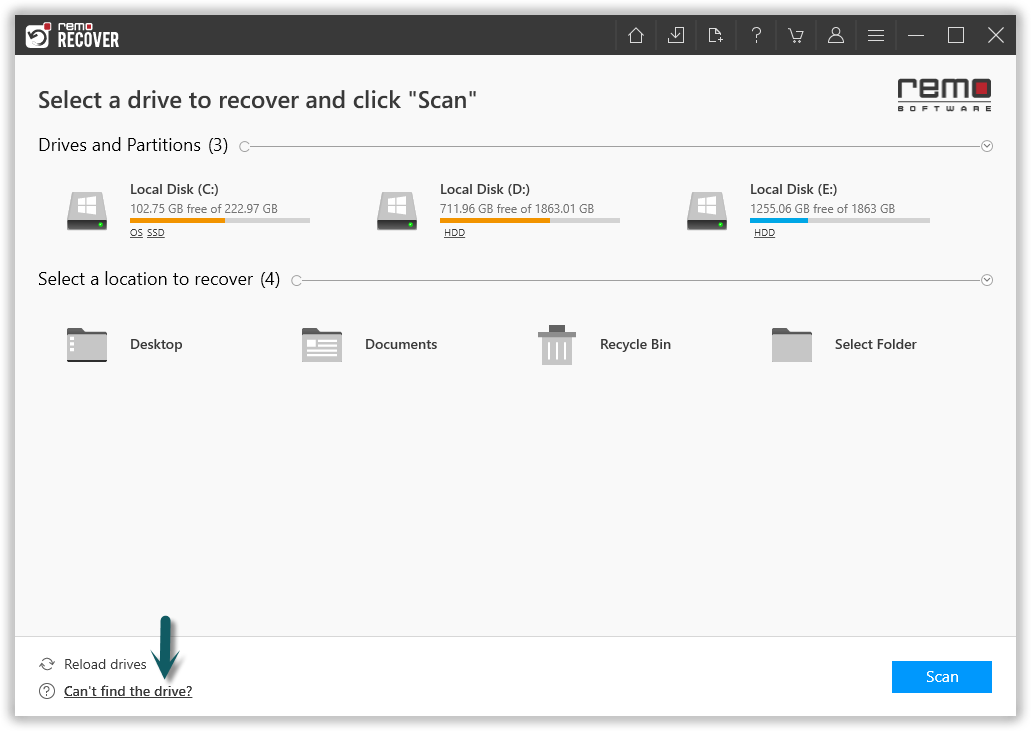
Figure 1: Select the Drive and Click Scan
Step 2: After completion of the Quick Scan process the tool will run into Deep Scan automatically and list all the folders and files in Dynamic Recovery View, Preview the recovered folders and files and verify.
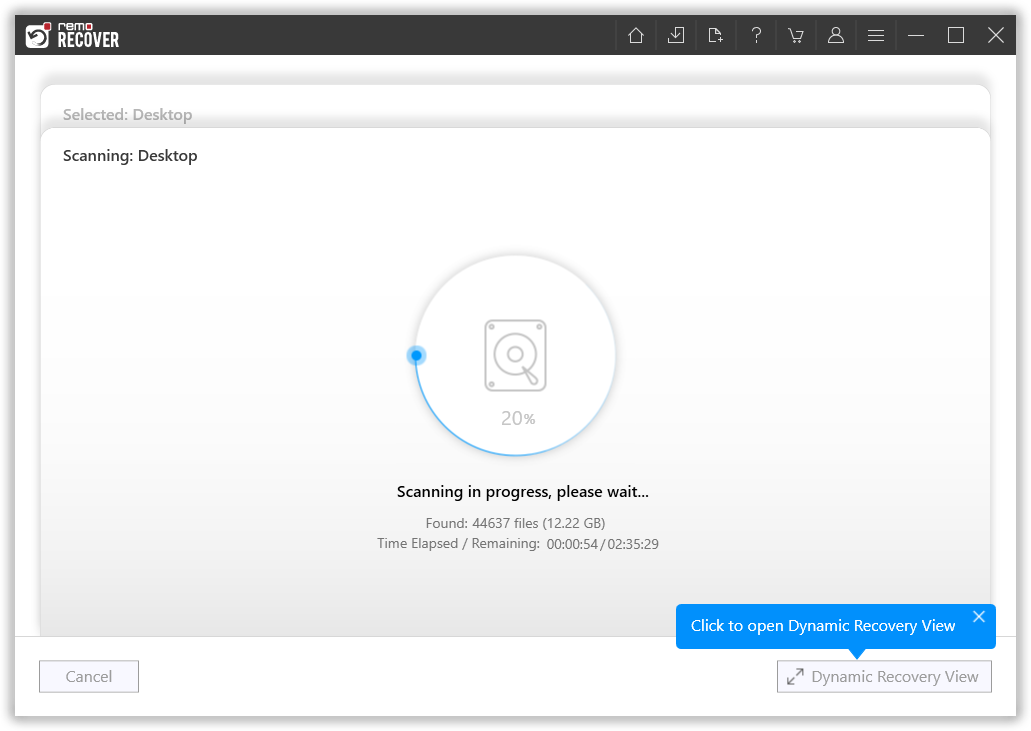
Figure 2: Scanning for Folders
Step 3: Software completes quick scan, and starts with the deep scan to recover more files. After the completion of quick scan, you can find any files you are looking for using the search bar or filters.
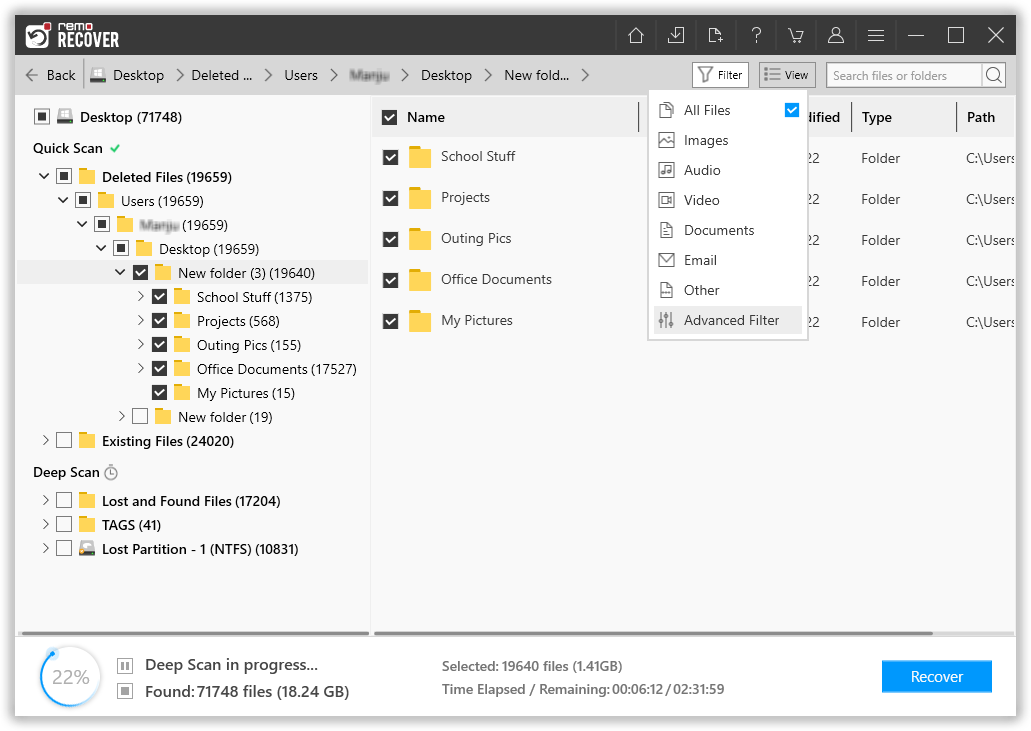
Figure 3: Recovered Files after Quick Scan
Step 4: Double click on any file to preview the files, and evaluate the recovery results.
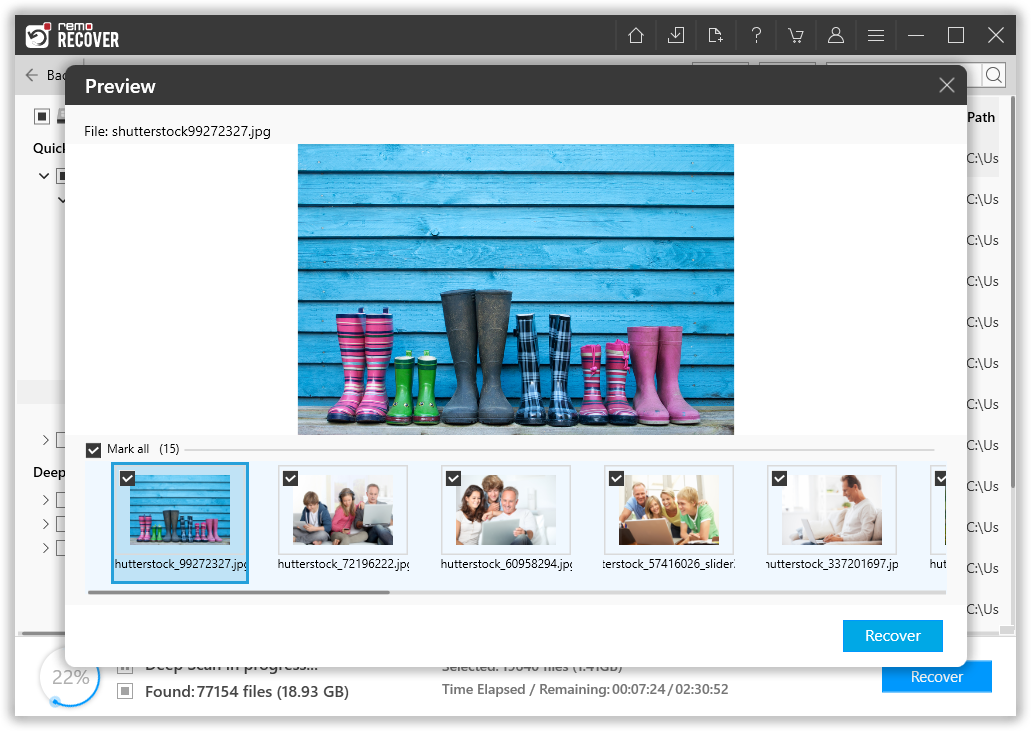
Figure 4: Preview Window
Step 5: Lastly, select a suitable destination path to save the recovered files.
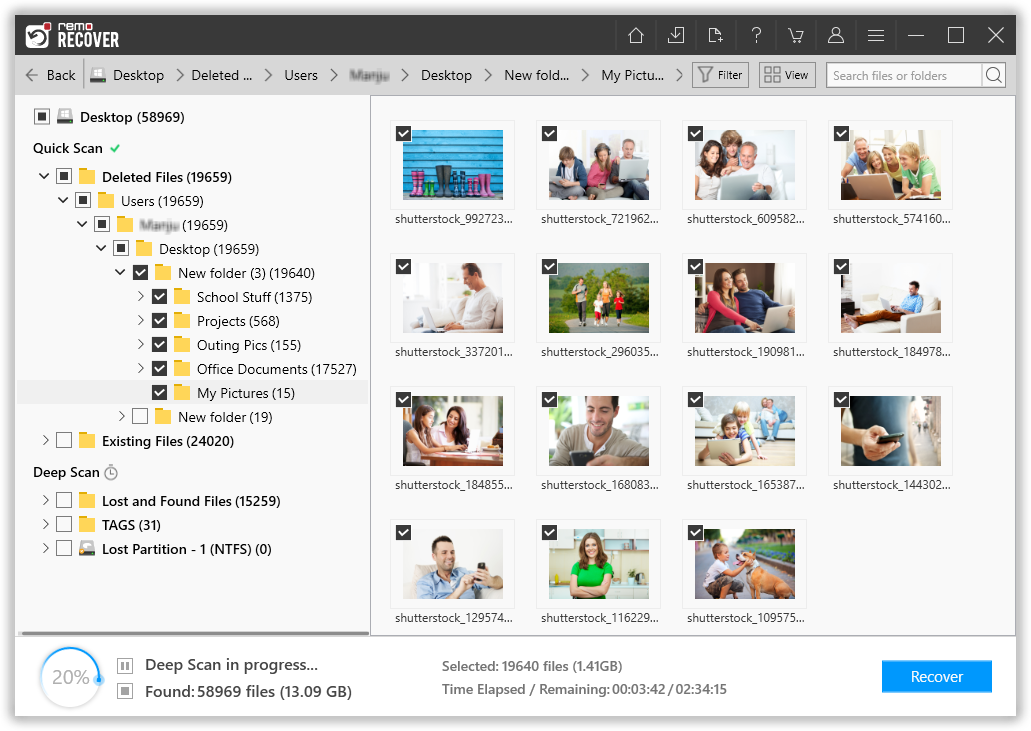
Figure 5: Save Recovered Folders