How to Recover Deleted Pictures?
- All formats of images like IMG, TIFF, GIF, RAW, CRW, CR2, ARW, PNG, DNG, PSD, NEF, etc. can be recovered
- Supports photo recovery from memory cards, external HDD, SSD, USB drives, memory sticks, iPods, etc.
- Demo version of the software is available for a free download that recovers deleted and lost pictures and also offers a preview of the recovered images before activating the licensed version
- Supported by all editions of Windows and Mac machines.
Smartphones or mobiles designed with an inbuilt digital camera. This makes it handy to click photos without carrying the digital camera, all around. The photos captured from your Android Smartphone camera as well as Digital Camera are saved under DCIM (Digital Camera IMages)folder. Well, these pictures in the DCIM folder could get lost or deleted due to several factors-
- Mistaken deletion
- Format operation
- Card corruption
- Impact of virus and malware
- Improper ejection
Upon experiencing picture deletion from the DCIM camera, you should stop using the card for saving new files in order to successfully undelete DCIM media. Until and unless the files are overwritten by any new files, the deleted files can be retrieved. Check https://www.folderrecovery.net/file-recovery-software.html to know how to recover files lost from the system
Retrieve DCIM files using the Folder Recovery tool
The Folder Recovery tool is an excellent tool for performing restoration of DCIM folder items. With the help of this software, you can retrieve photos of formats like PNG, PSD, GIF, CRW, CR2, JPEG, and so on. It supports all media file formats of images, videos, audio, documents, etc. This utility is capable to recover folders from Windows Server 2003 and 2008, Windows 10, Windows 8, Windows 7, Windows XP, and Vista. It also serves useful in retrieving deleted images folder from popular storage devices like hard disk, USB flash drives, SSD, iPods, memory sticks, and many more.
Other notable features of the Folder Recovery program:
- Available in a demo version
- Displays a preview of the retrieved files in two different panes
- Sorts the regained media files based on filename, size, modified date, and creation date
- Retrieves deleted music folders without altering the original file structure
Easy steps to recover deleted pictures:
Step 1: Launch the tool, Select the drive from which you want to recover deleted folders and hit the Scan button. If you can’t locate the drive try clicking on Can’t Find Drive? option on the bottom left corner, this will scan your system to locate the drives that weren’t listed before.
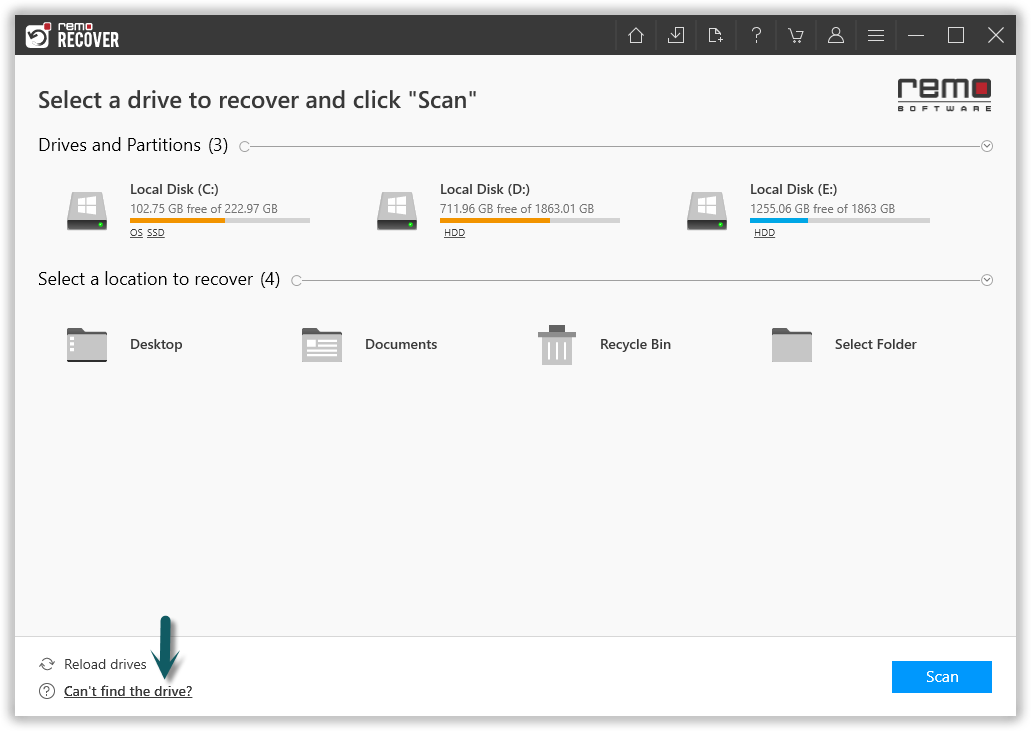
Figure 1: Select the Drive and Click Scan
Step 2: After completion of the Quick Scan process the tool will run into Deep Scan automatically and list all the folders and files in Dynamic Recovery View, Preview the recovered folders and files and verify.
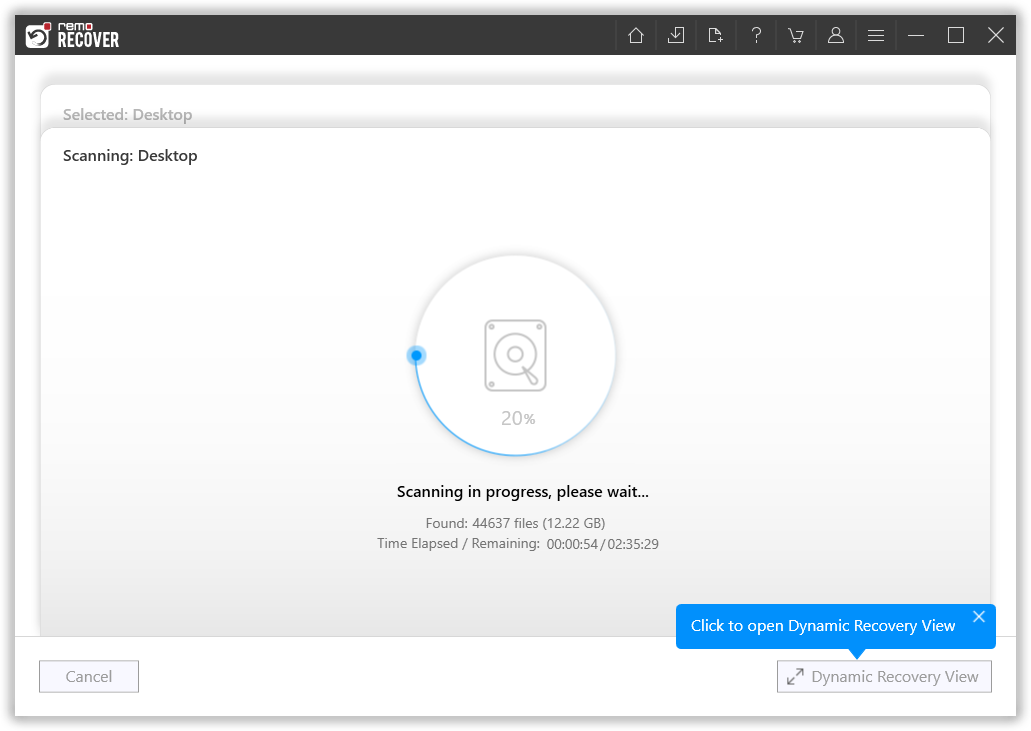
Figure 2: Scanning for Folders
Step 3: Software completes quick scan, and starts with the deep scan to recover more files. After the completion of quick scan, you can find any files you are looking for using the search bar or filters.
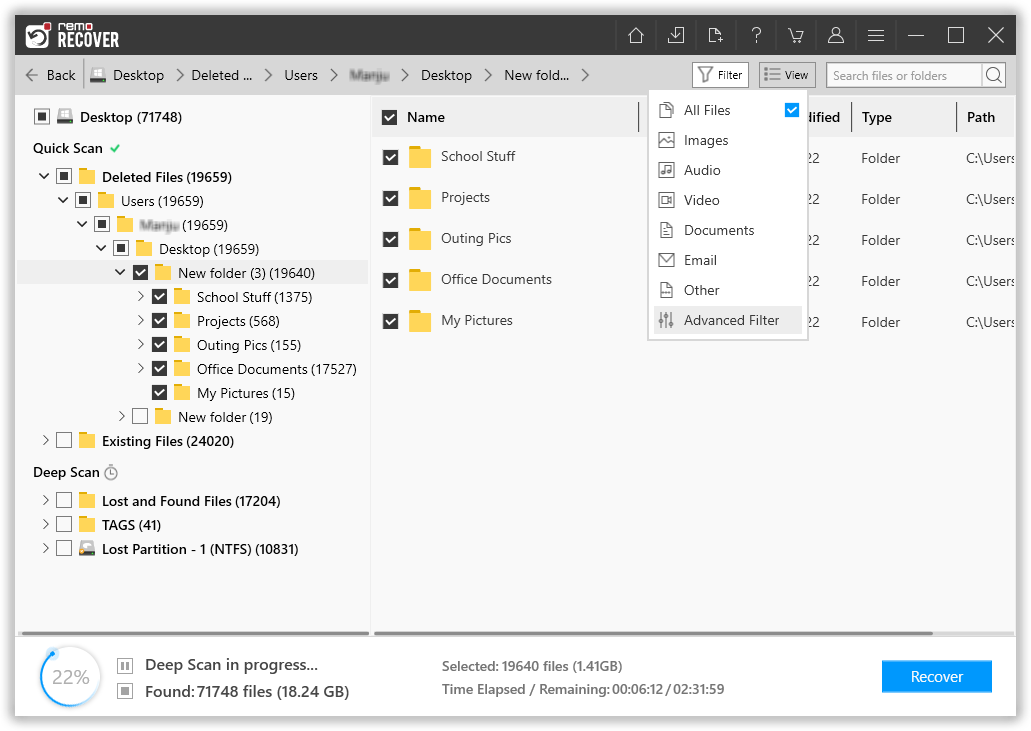
Figure 3: Recovered Files after Quick Scan
Step 4: Double click on any file to preview the files, and evaluate the recovery results.
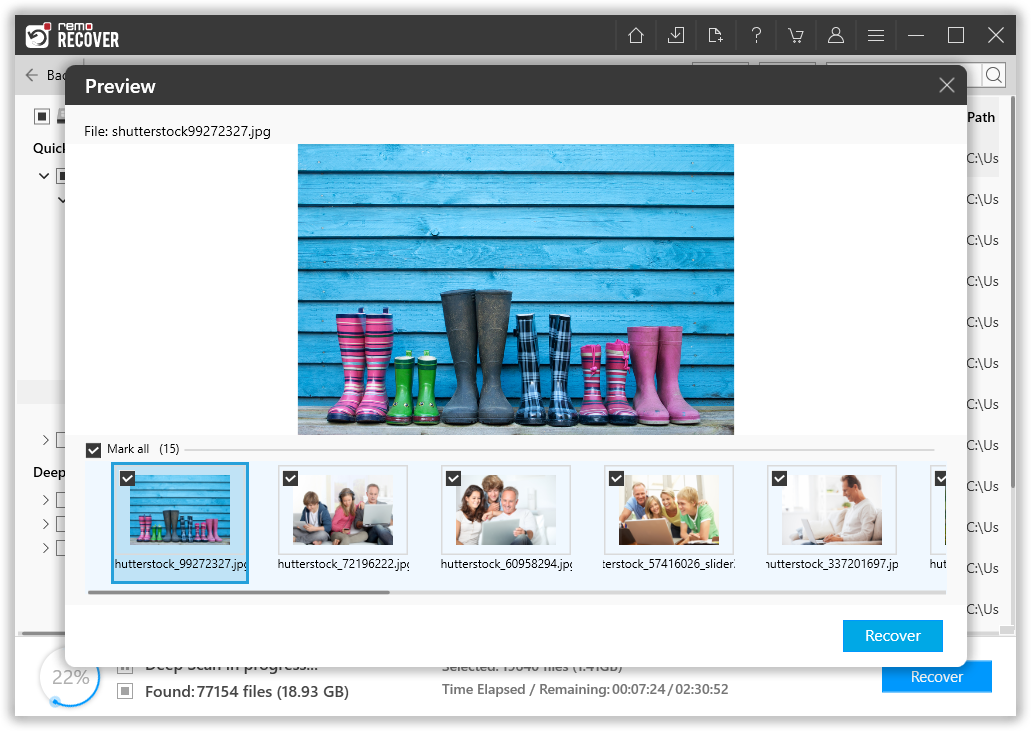
Figure 4: Preview Window
Step 5: Lastly, select a suitable destination path to save the recovered files.
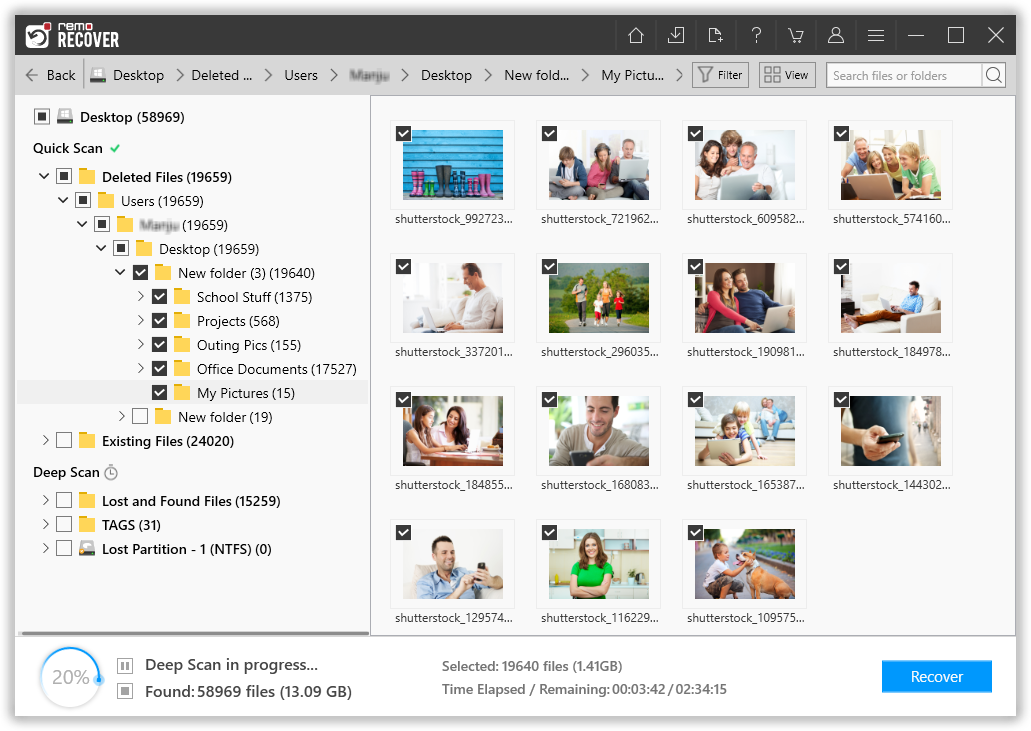
Figure 5: Save Recovered Folders