How to Recover Deleted Folders from Laptop?
- An efficient tool to restore files and folders from laptop drives.
- Suitable to work with all brands of laptops and desktops
- Supports recovery from hard drives, SSD, memory cards, USB drives, iPods, etc.
- Works with all file formats of documents, pictures, videos, songs, and others
- Compatible with the latest versions of Windows including- Windows 10, 8, 7, XP, Vista, and Server editions
Folders deleted from the laptop
The files and folders from a laptop get deleted due to several scenarios. Any vital pictures, documents, audio, video, etc. saved on the laptop drive will be threatened due to various instances of folder deletion. Well, if you have maintained a timely backup of the laptop drive files then you can easily restore it. If not, you will need a powerful folder retrieval software to undelete the laptop folders.
Note: Do not use the laptop further to add any new files as it might overwrite the data that you are looking to restore. The folders once overwritten will be permanently deleted and cannot be recovered at any cost.
Undelete laptop files using the Folder Recovery software
Folder Recovery is a promising tool to undelete folder from a laptop. It employs a powerful scan engine that deep scans the laptop HD and extracts all files and folders from it. Thereby, it makes it possible to recover the iTunes media folder, media files, documents, EXE files, compressed folders, emails, etc.
Using this incredible utility, you can restore files and folders from an external hard drive, iPods, memory cards, SSD, USB drives, and more. You can also check how to recover iTunes media folder using this application. Along with recovering deleted folder from the laptop, it also facilitates you to restore moved folder in an efficient way. After the folder retrieval process, it facilitates you to preview restored folders prior to restoration. Folder Recovery program also helps you restore data from a Toshiba laptop hard drive, Dell, HP, Lenovo, Acer, Sony, Asus, Samsung, and so on.
Some of the data loss scenarios where Folder Recovery tool serves useful
- Applying Shift + Delete keys mistakenly on vital files
- Virus, malware, and other threats
- Emptying the Recycle Bin
- Interruption while moving folders from one drive
- Drive errors and format operation
- File system errors
- Bad sector formations
Steps to recover deleted folder from laptop:
Step 1: Launch the tool, Select the drive from which you want to recover deleted folders and hit the Scan button. If you can’t locate the drive try clicking on Can’t Find Drive? option on the bottom left corner, this will scan your system to locate the drives that weren’t listed before.
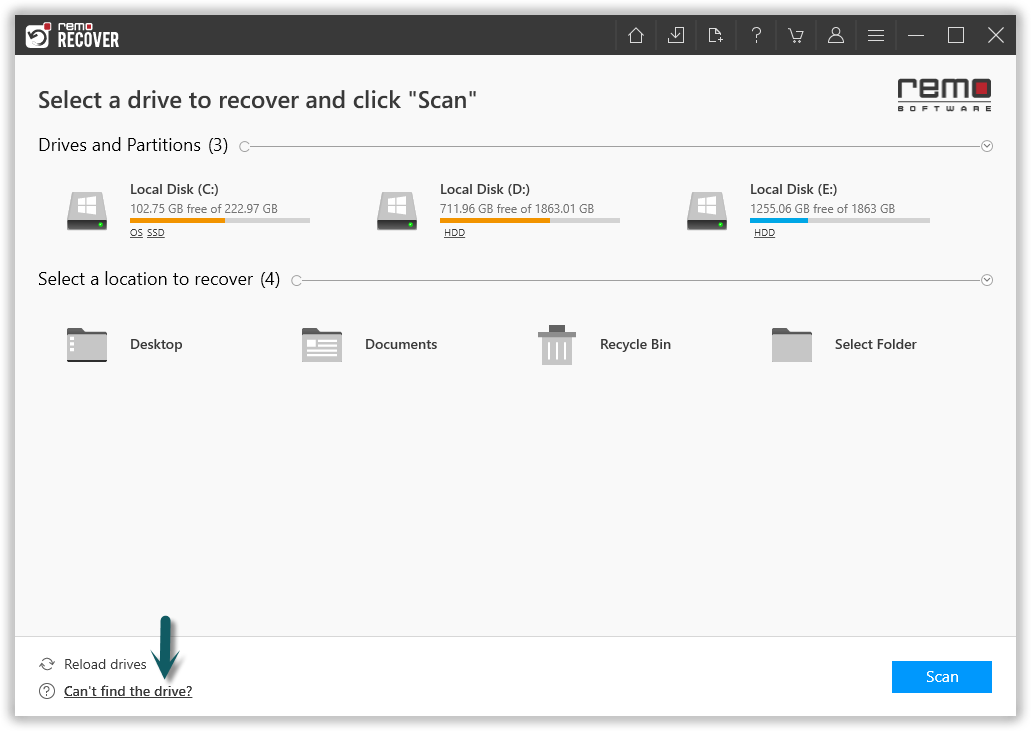
Figure 1: Select the Drive and Click Scan
Step 2: After completion of the Quick Scan process the tool will run into Deep Scan automatically and list all the folders and files in Dynamic Recovery View, Preview the recovered folders and files and verify.
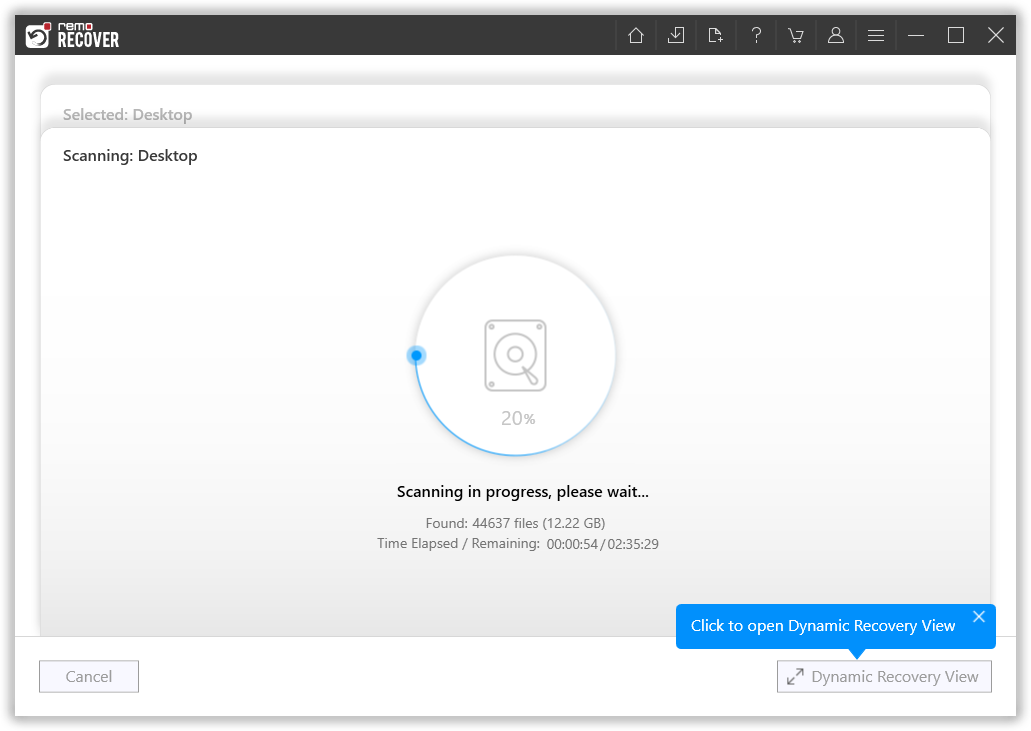
Figure 2: Scanning for Folders
Step 3: Software completes quick scan, and starts with the deep scan to recover more files. After the completion of quick scan, you can find any files you are looking for using the search bar or filters.
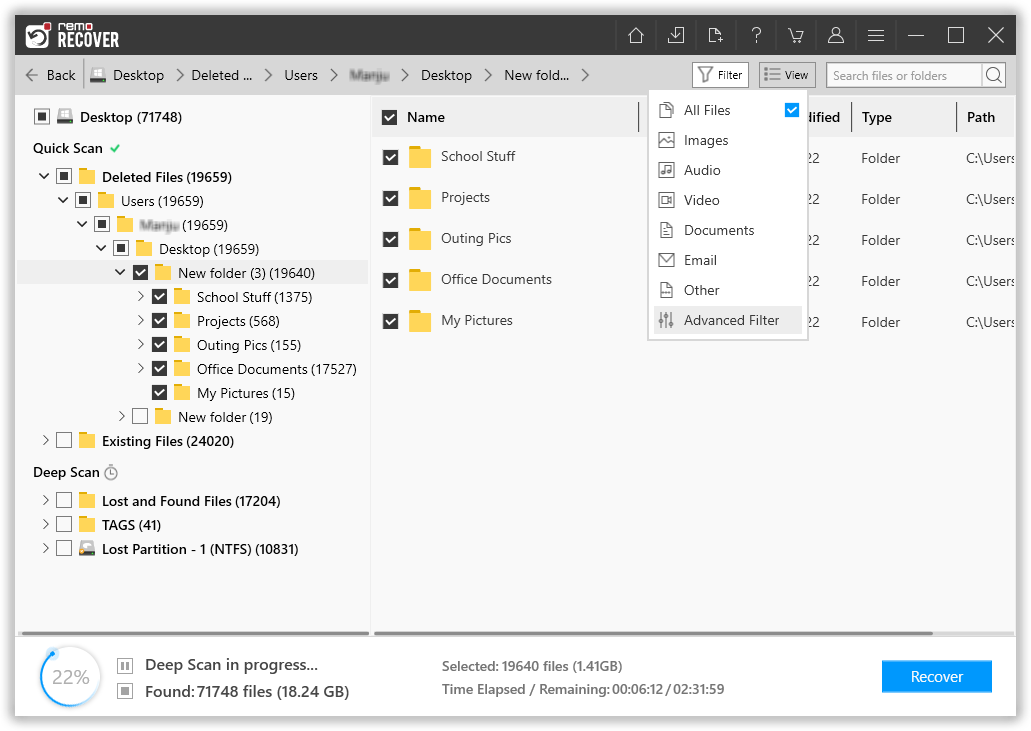
Figure 3: Recovered Files after Quick Scan
Step 4: Double click on any file to preview the files, and evaluate the recovery results.
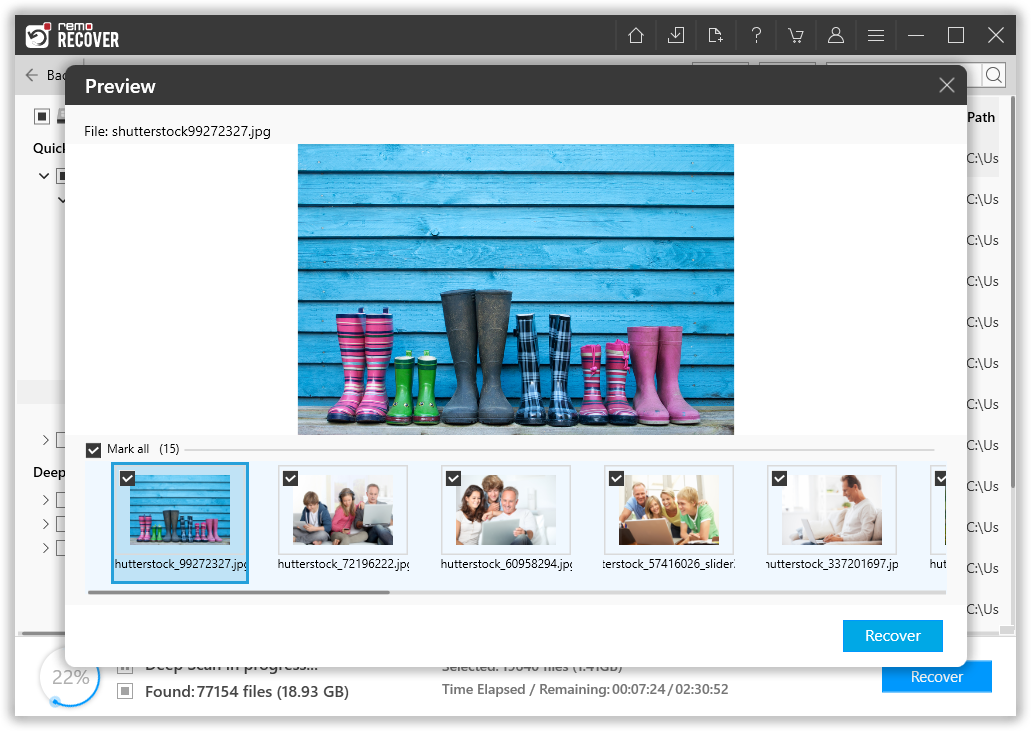
Figure 4: Preview Window
Step 5: Lastly, select a suitable destination path to save the recovered files.
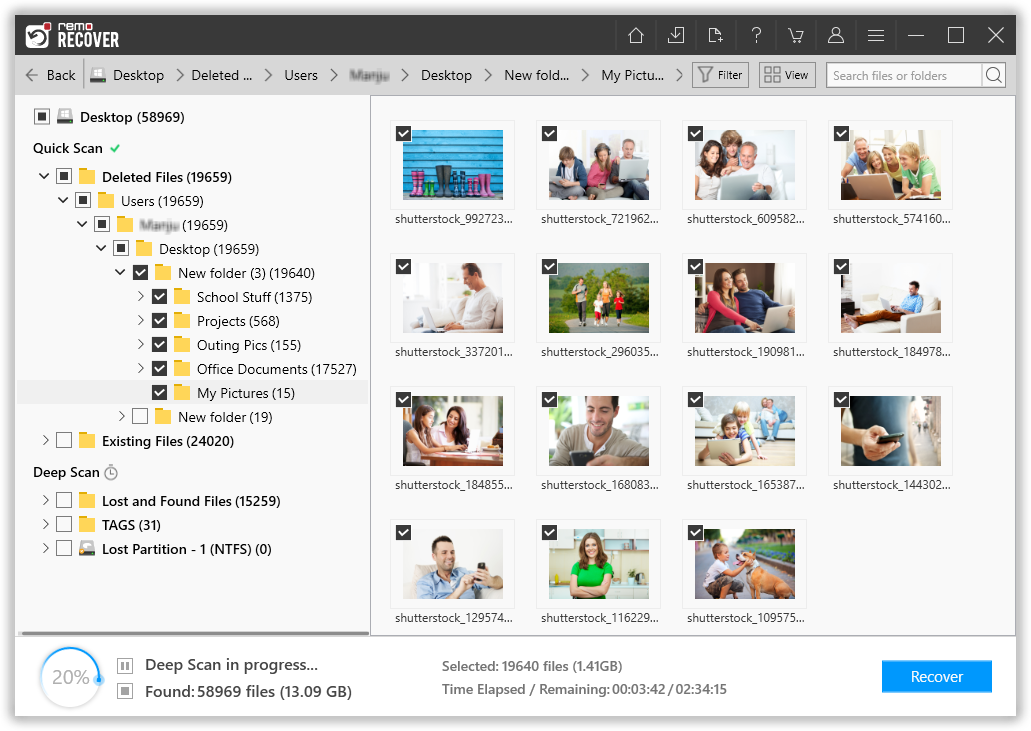
Figure 5: Save Recovered Folders