Recover Folders Deleted from C: Drive
- Instantly regains files and folders deleted from C drive after accidental deletion, formatting, drive corruption, new OS installation, or reinstallation of the existing OS
- Retrieves all hard disk partitions along with C drive in simple clicks
- It is also capable to revive data from external HDD, SSD, memory card, USB flash drive, iPods, etc.
- Even the trial version of the tool extracts data and displays retrieved files for a preview
- The recovered files will be sorted on the basis of the filename, file size, creation date, and modified date
Computers using an operating system like Windows, commonly use alphabets for naming the disk drives. The hard drive is identified with the letter C. A and B for floppy disks, sometimes it uses for tape drives too. Alphabets after C are used for naming the new partitions in the computer. Generally, the C drive contains all the program files, which means whatever you installed in your system, all the basic files and folders of those applications are saved in the C Drive. So we can say that each and every folder in the C drive are very important. If you delete your folder in the C drive accidentally, then it proves to be a troublesome situation.
How the folder gets deleted from C Drive?
- Emptied Recycle Bin: Whenever you delete a folder, it will get saved in the Recycle Bin. If you want to restore deleted files from the Recycle Bin, just open the Recycle Bin and select the option “Restore”. But, if you clear the Recycle Bin, then the folder gets deleted permanently and there is no option availed on your system to restore the C drive data.
- Using Shift + Delete keys: If you delete a folder using Shift and Delete button, then the folder does not go to Recycle Bin. The file will be completely removed from its file location.
- Virus Attack: Viruses are one of the common reason for deletion/loss of the essential folders from the C drive.
- Accidental Format: If you accidentally format or re-install the OS then all your data will get deleted as reinstallation process.
Well, the files are not entirely deleted from the hard disk storage even after format, shift-delete, or emptying the recycle bin folder. The deleted files remain in the same storage drive location until they are overwritten by any new files. So, therewith, care must be taken to avoid any further write operation on the disk as soon as deletion occurs. Therefore, unless the deleted files are overwritten, it is possible to regain the C: data using a reliable data recovery application.
The best solution to retrieve C: data
The Folder Recovery software is a remarkable application to restore deleted folders from the C drive. It is equipped with efficient algorithms that scan the system drive and fetches all the data from C drive. The program is also capable to regain data from all other logical disk partitions in a hassle-free manner.
This utility works on a read-only mode and will not alter any file/folder contents from the drive partitions. As the program supports the restoration of more than 300 file types, one can easily recover PST folder, Documents folder, Pictures folder, Songs folder, Zipped folders, and so on.
Attractive features of the C: folder recovery software:
- Supports partition recovery from the disk formatted with any disk file systems
- Returns a preview of the restored file items after a scan operation
- Highly capable to recover folder accidentally deleted, formatted, or corrupt C drive
- Offers complete drive partition data recovery in a secure and easy set of steps
- Also suited to work with various brands of external devices like- external HDD, Solid-State Drives(SSD), USB Flash drive, memory cards, iPods, and others.
- Lets the users save the regained data anywhere in the system except the location from where you have deleted the folders. In this case, it's C drive.
- Sorts the recovered file items in a new window on the basis of their filename, size, modified date, and creation date.
- It is also available in a trial version
- Apart from this, you can avail the demo version for free to analyze the efficiency of the software before purchasing it
- Features a Save Recovery Session option to save the scanned session, which avoids rescanning the C drive after purchasing the software
Simple steps to recover folders deleted from C drive
Step 1: Launch the tool, Select the drive from which you want to recover deleted folders and hit the Scan button. If you can’t locate the drive try clicking on Can’t Find Drive? option on the bottom left corner, this will scan your system to locate the drives that weren’t listed before.
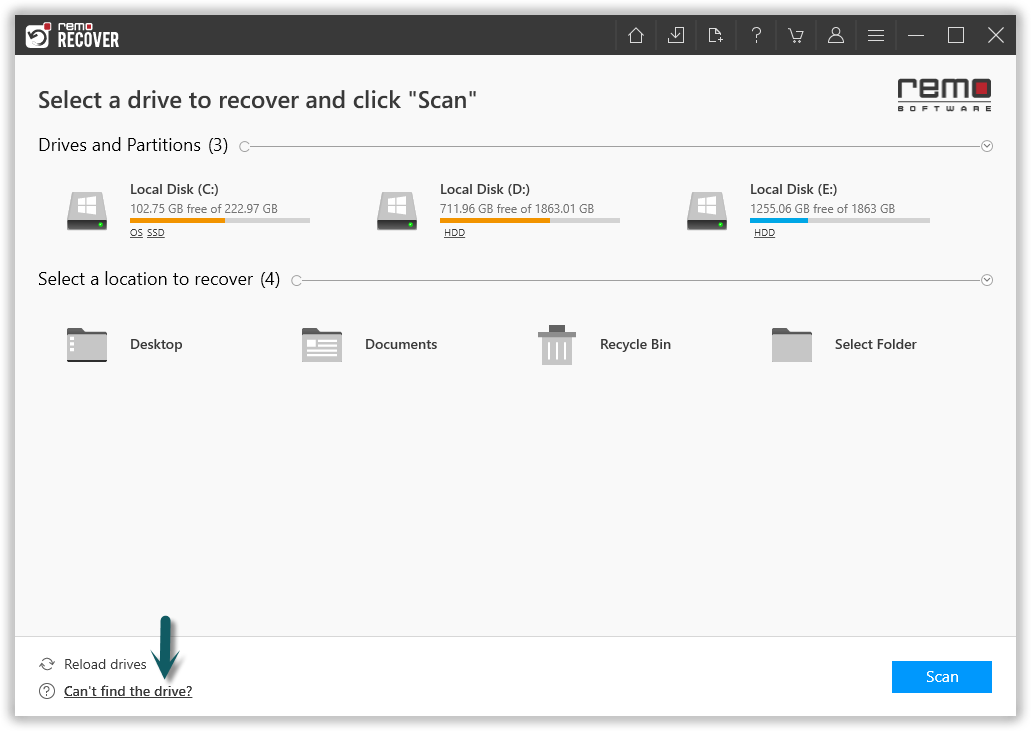
Figure 1: Select the Drive and Click Scan
Step 2: After completion of the Quick Scan process the tool will run into Deep Scan automatically and list all the folders and files in Dynamic Recovery View, Preview the recovered folders and files and verify.
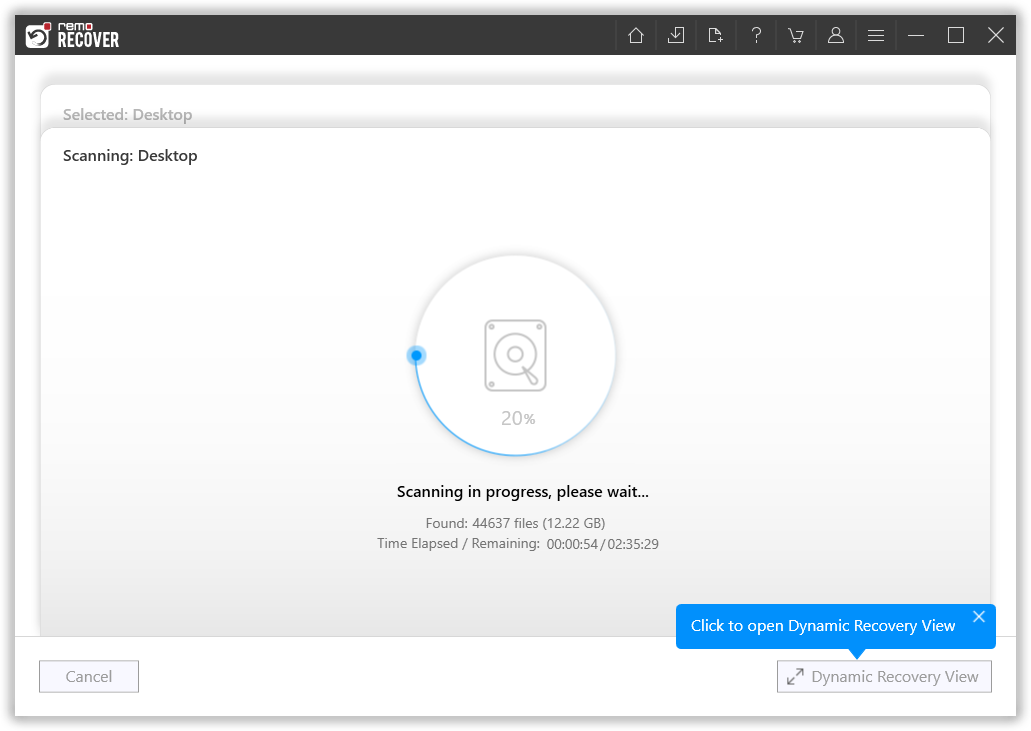
Figure 2: Scanning for Folders
Step 3: Software completes quick scan, and starts with the deep scan to recover more files. After the completion of quick scan, you can find any files you are looking for using the search bar or filters.
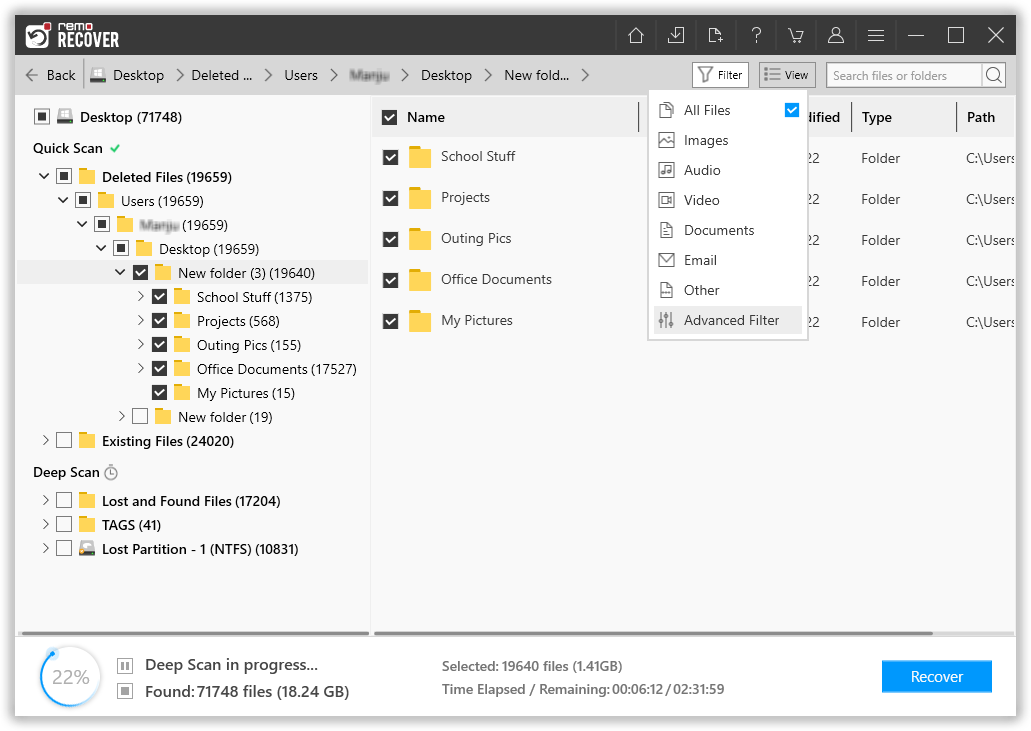
Figure 3: Recovered Files after Quick Scan
Step 4: Double click on any file to preview the files, and evaluate the recovery results.
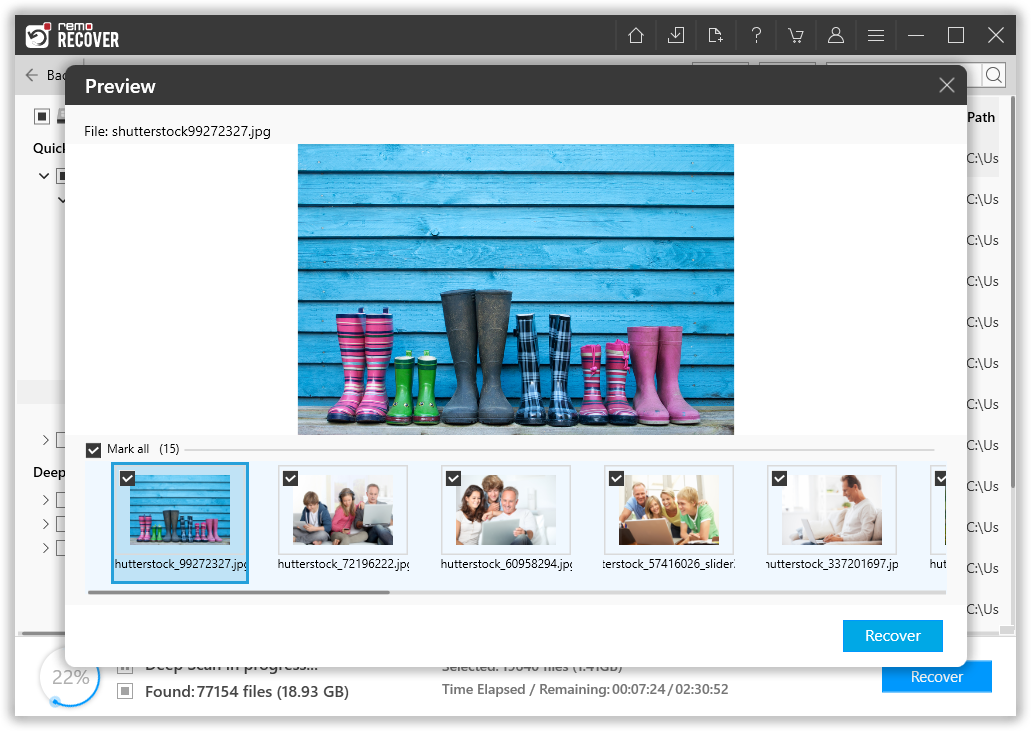
Figure 4: Preview Window
Step 5: Lastly, select a suitable destination path to save the recovered files.
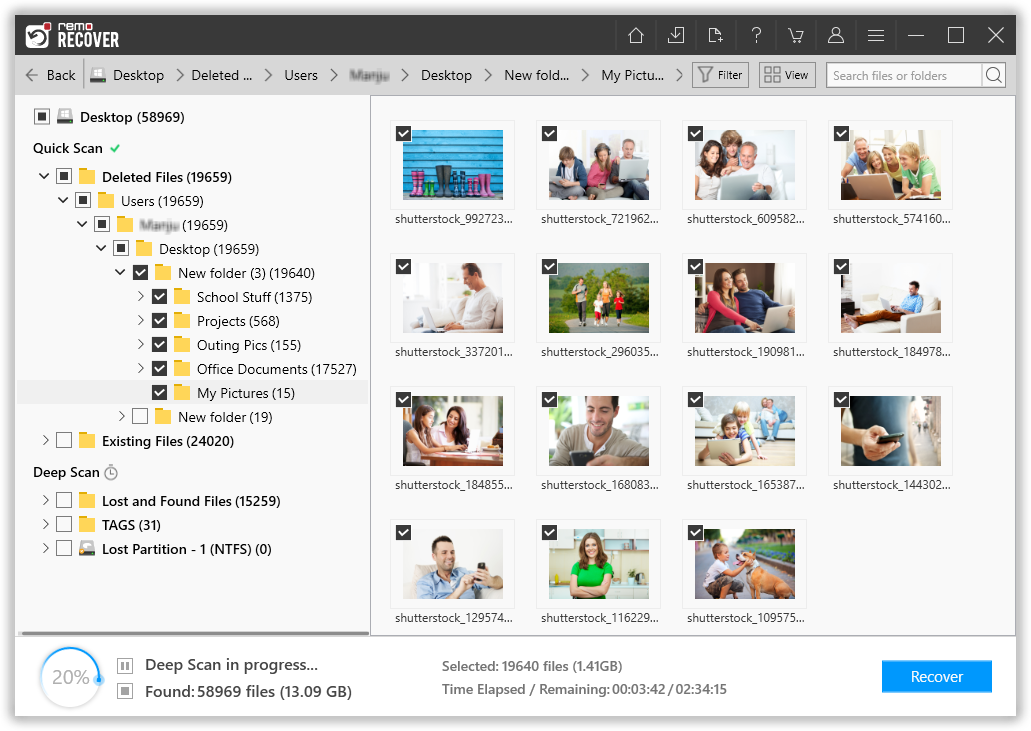
Figure 5: Save Recovered Folders