Recovering Deleted Files and Folders on Windows Server
- Securely undeletes files/folders from Windows Server 2003 and 2008 using the advanced scanning algorithms
- Supports data recovery from system internal hard drive, external HDD, USB pen drive, SSD, memory card, and other storage devices
- Also compatible with other versions of Windows OS (Windows 10, 8.x, 7, Vista, and XP)
- Allows to preview the recovered folder items even in the demo version
- Capable to fetch more than 300 types of files including spreadsheets, workbooks, presentations, pictures, videos, audio files, emails, and other text documents
To access important and relevant files frequently we store files in the separate folders. The folders could contain essential documents and other media files. These files and folders could get lost or deleted from the system drive including the Windows Server systems(2003 or 2008).
Folders deleted from Windows Server
Folders and files can be deleted due to various known and unknown factors. At worst cases, even a backup of the deleted file may not be available. Some possible reasons for deletion of files from the Windows Server machines include-
- Shift-Delete operation
- Accidental format
- Emptied Recycle bin
- Drive corruption
- Virus and other malicious threats
Upon encountering deletion or loss of folders from the Windows Server systems you need to run a reliable data recovery program to undelete folders. Well, the Folder Recovery program serves to be the best way to get back Server files in an effortless way.
Retrieve files deleted from Windows Server easily using the Folder Recovery program
The Folder Recovery is a highly-qualified software built to restore deleted files/folders from Windows Server systems. This popular application will aid you in recovering deleted files and folders on Windows Server 2003 and Windows Server 2008. This advanced tool implements a powerful algorithm that scans and fetches the deleted data from the hard disk partitions. It is also capable to retrieve various formats of files from the Windows Server disk partitions. Other than Windows Server, it also supports folder recovery from Windows 10, 8.x, 7, Vista, and XP. Visit https://www.folderrecovery.net/deleted-windows-xp.html to know more about Windows XP deleted folder recovery.
One can also run the demo version of the Folder Recovery program and check out how well this utility works. Here you can Save Recovery Session and later avoid rescan of the drive when you activate the licensed version of the software. The program lets you preview the retrieved files in both the trial version and the purchased version.
Note: Learn more about MS Outlook folder recovery by following the link- https://www.folderrecovery.net/outlook.html.
Steps to Recover deleted files and folders from Windows Server
Step 1: Launch the tool, Select the drive from which you want to recover deleted folders and hit the Scan button. If you can’t locate the drive try clicking on Can’t Find Drive? option on the bottom left corner, this will scan your system to locate the drives that weren’t listed before.
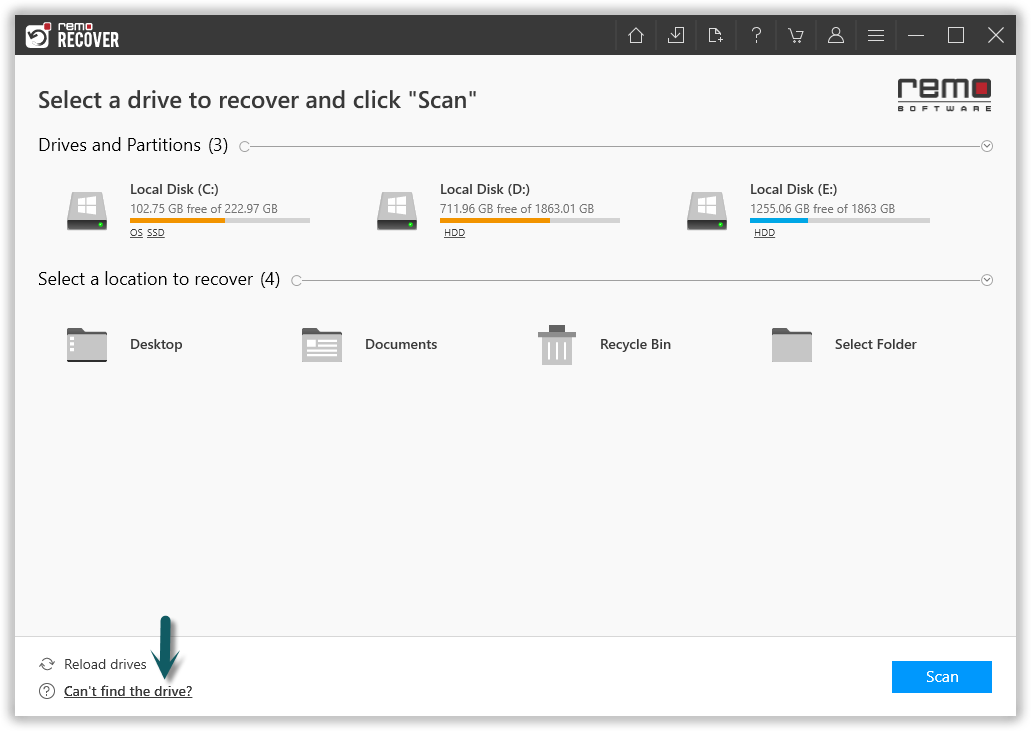
Figure 1: Select the Drive and Click Scan
Step 2: After completion of the Quick Scan process the tool will run into Deep Scan automatically and list all the folders and files in Dynamic Recovery View, Preview the recovered folders and files and verify.
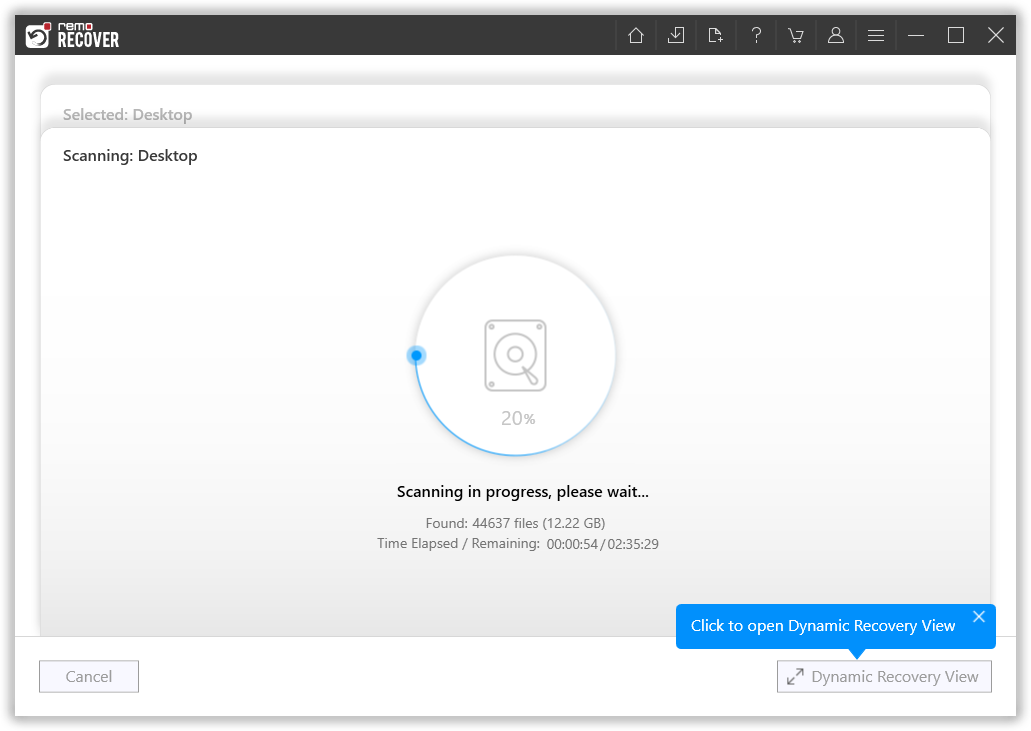
Figure 2: Scanning for Folders
Step 3: Software completes quick scan, and starts with the deep scan to recover more files. After the completion of quick scan, you can find any files you are looking for using the search bar or filters.
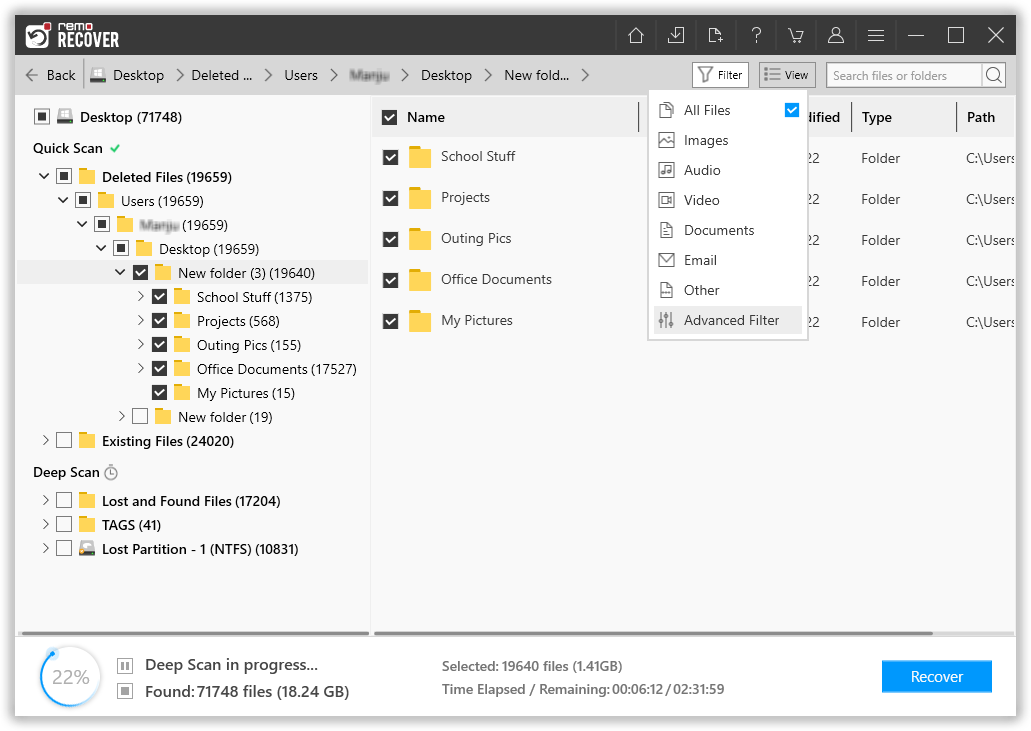
Figure 3: Recovered Files after Quick Scan
Step 4: Double click on any file to preview the files, and evaluate the recovery results.
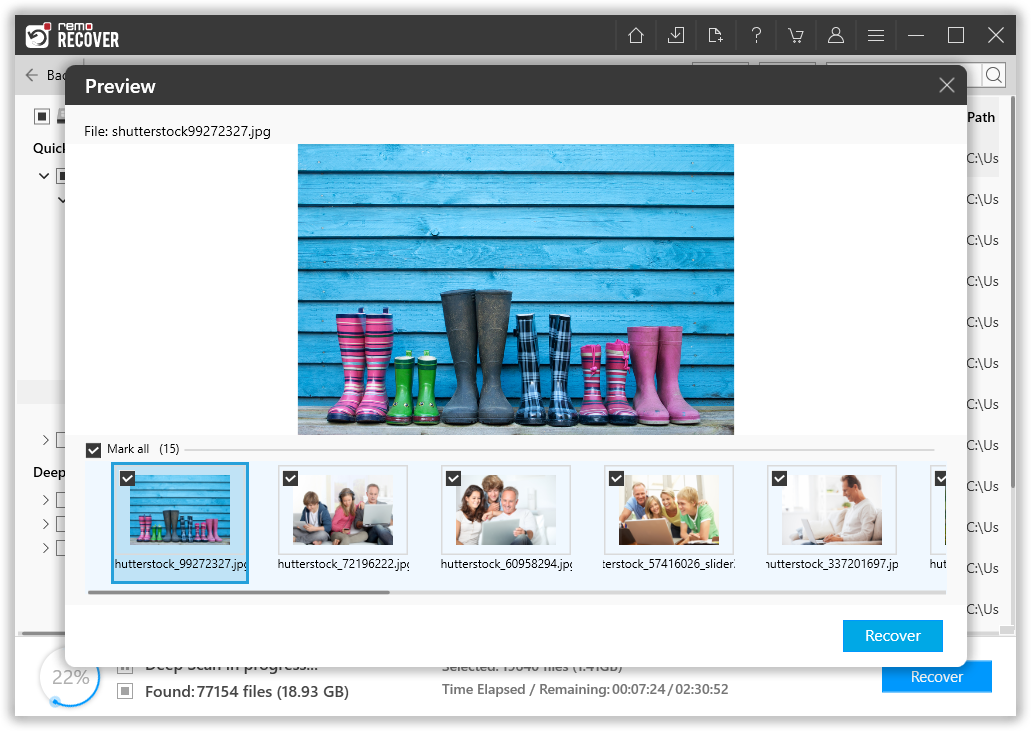
Figure 4: Preview Window
Step 5: Lastly, select a suitable destination path to save the recovered files.
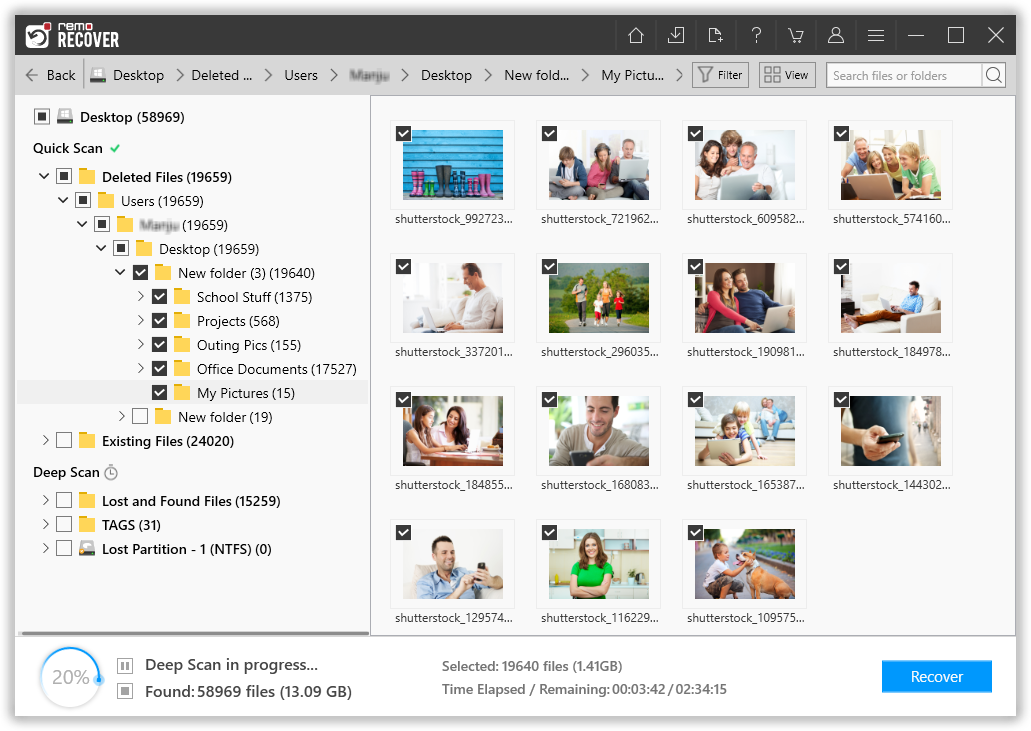
Figure 5: Save Recovered Folders