How to Recover Deleted DCIM Folder from SD Card?
- Quickly regains deleted or lost DCIM folder from SD card that is used in digital cameras, mobile phones, camcorders, and other gadgets
- Recovers DCIM folder deleted or lost after formatting, accidental deletion, and corruption of the SD card
- Demo version is available for free download that recovers deleted, or lost DCIM folder from SD card and offers free preview of the recovered folder before saving
- The tool is available in Windows & Mac editions that is compatible with the latest Windows 10 & macOS High Sierra, and their earlier versions
Losing the DCIM folder from your SD card can result in the loss of precious photos and videos. However, with the right approach and tools, you can recover the deleted DCIM folder and restore your cherished memories. In this step-by-step guide, we will walk you through the process of recovering a deleted DCIM folder from an SD card. Follow the instructions carefully to increase the likelihood of successful recovery. Before going on to the process of deleted DCIM folder from SD card, let's have a quick look of the scenarios leading to the deletion of DCIM folder.
Scenarios leading to the deletion of DCIM folder from SD card
- The main threat to the DCIM folder is the virus attack on the memory card. SD card in smartphones or digital camera can be easily affected by the virus usually when it is connected to a virus-infected computer.
- Abrupt removal of the SD card from the camera or mobile phones while DCIM folder is in use. The sudden removal of memory cards during data transfer between devices could also be a reason for the loss of data from the DCIM folder
- All the files and folders including image files in the DCIM folder can be lost due to accidental formatting of the SD card.
- Images present in DCIM folder can be lost due to accidental deletion of images from the application like a gallery.
Loss of data from DCIM folder can also occur due to many more reasons and are unpredictable. Henceforth, it is always better to keep the backup of folders in the memory card in order to avoid any data loss. If a relevant backup is unavailable then you need to switch to a reliable DCIM folder recovery software. Well, the Folder Recovery is regarded as a perfect solution to recover DCIM folder from SD card which is lost due to various scenarios as mentioned above.
Precautionary Measures to be taken before recovery: Stop Using, and Protect the SD Card
- Stop using the SD Card: As soon as you realize that the DCIM folder has been deleted, stop using the SD card to prevent further data overwriting. Continued usage can overwrite the deleted files, making recovery more difficult.
- Safely Remove the SD Card: Eject the SD card from the device to ensure it is safely disconnected.
Utilize this Folder Recovery Software to retrieve deleted DCIM folder from SD card:
The Folder Recovery program is equipped with rich-set algorithms that deeply scans your SD card to completely extract media files from it. This finest utility works in a read-only mode and thus will not alter the original media quality after restoration. You can easily run this DCIM folder recovery application on any version of Windows and Mac OSX. In addition to this, a demo version of the program is available for free download that effortlessly recovers DCIM folder from SD card, and allows a free preview of the recovered files prior activating the software. Thereby allows it's users to evaluate the software before activation.
Key Features of Folder Recovery Software
- Offers a fast, easy, secure technique to retrieve the DCIM folder that got deleted or lost
- This utility can easily recover deleted images from SDXC, SDHC, CF, xD, MMC, memory stick, USB drives, etc.
- Recovers DCIM folder from SD card and sorts the recovered data on the basis date, size, and file name
- Folder Recovery application allows the user to preview the recovered files from SD card prior to restoration of the same
- Greatly helpful in getting back all the missing image folders and deleted media files containing any file type extensions
Steps to recover DCIM folder from SD card:
Step 1: Launch the tool, Select the drive from which you want to recover deleted folders and hit the Scan button. If you can’t locate the drive try clicking on Can’t Find Drive? option on the bottom left corner, this will scan your system to locate the drives that weren’t listed before.
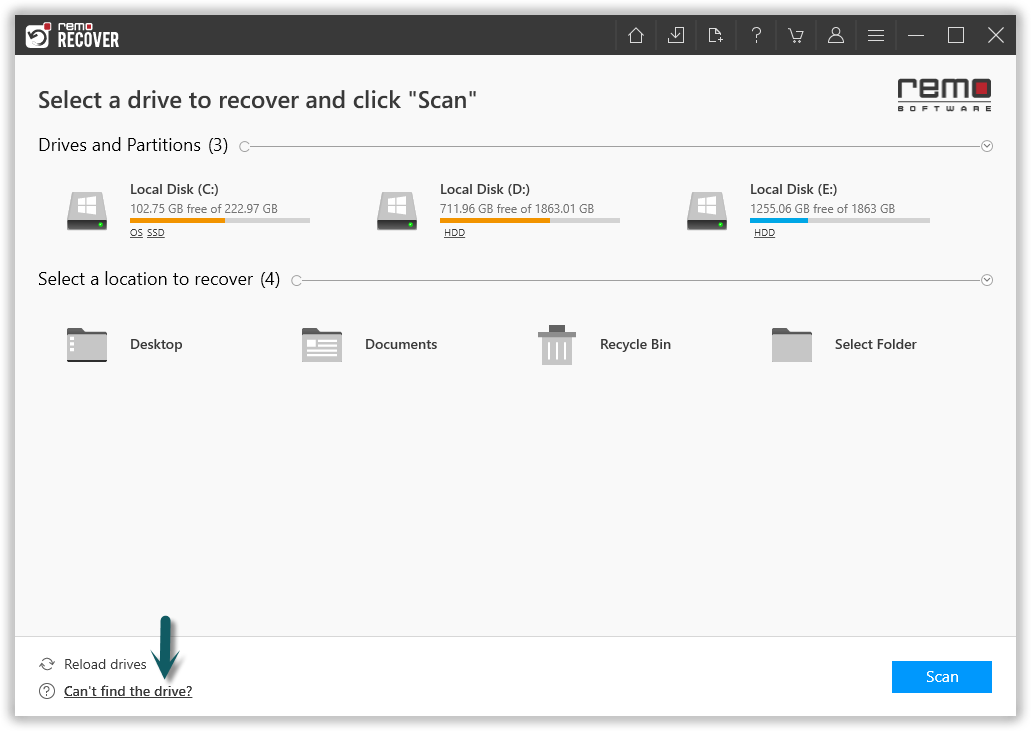
Figure 1: Select the Drive and Click Scan
Step 2: After completion of the Quick Scan process the tool will run into Deep Scan automatically and list all the folders and files in Dynamic Recovery View, Preview the recovered folders and files and verify.
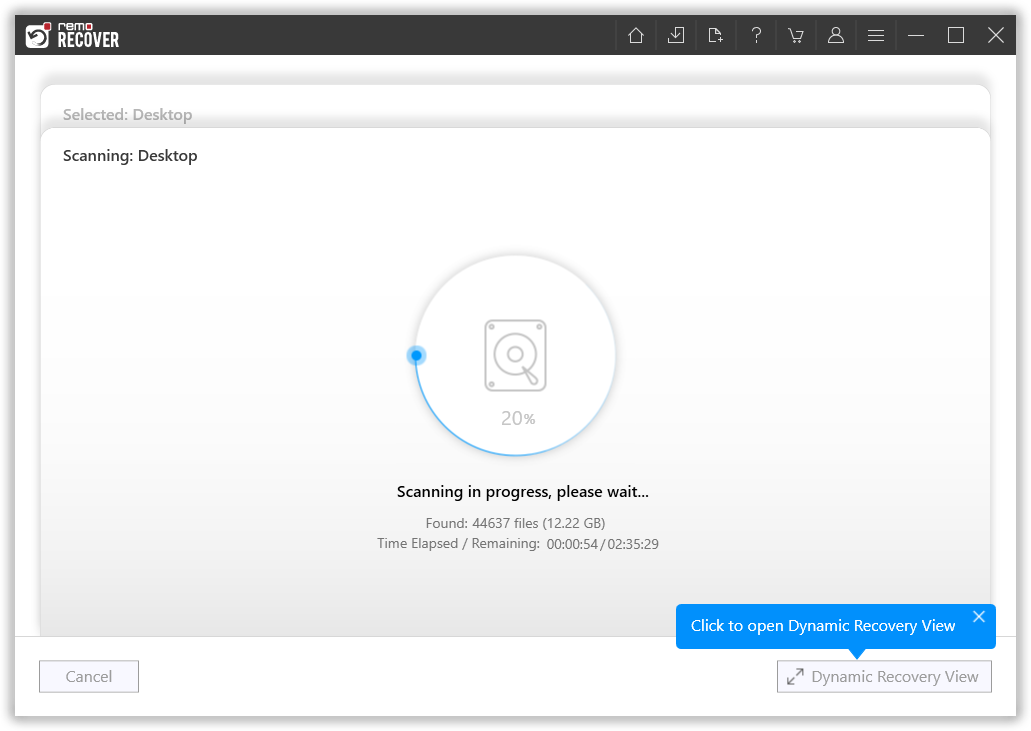
Figure 2: Scanning for Folders
Step 3: Software completes quick scan, and starts with the deep scan to recover more files. After the completion of quick scan, you can find any files you are looking for using the search bar or filters.
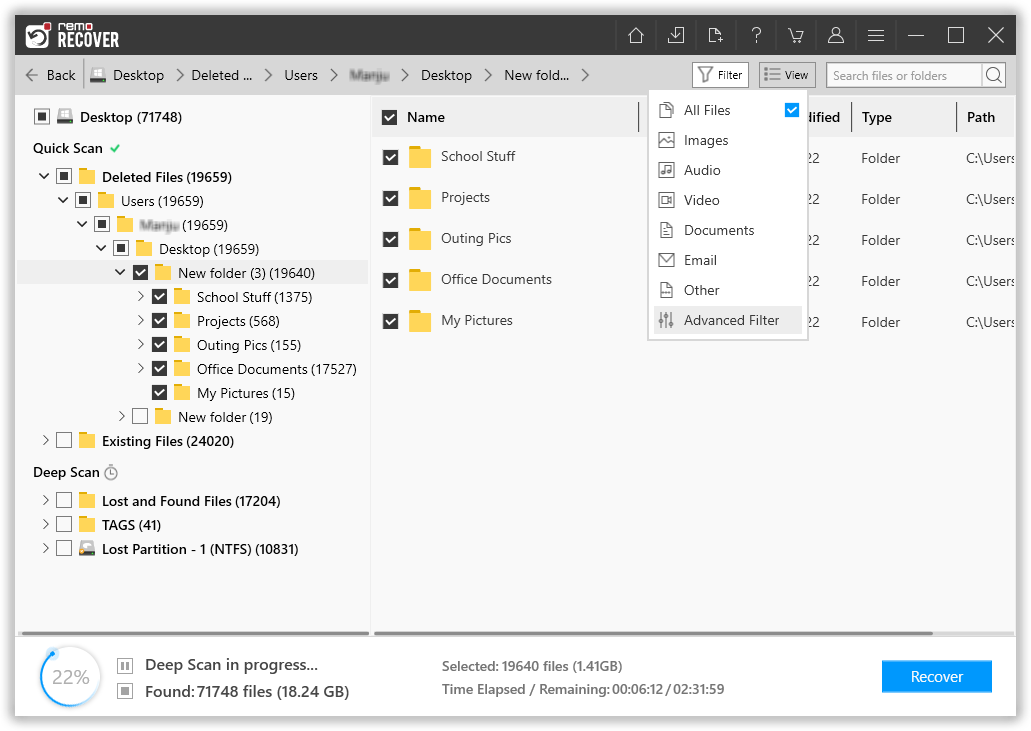
Figure 3: Recovered Files after Quick Scan
Step 4: Double click on any file to preview the files, and evaluate the recovery results.
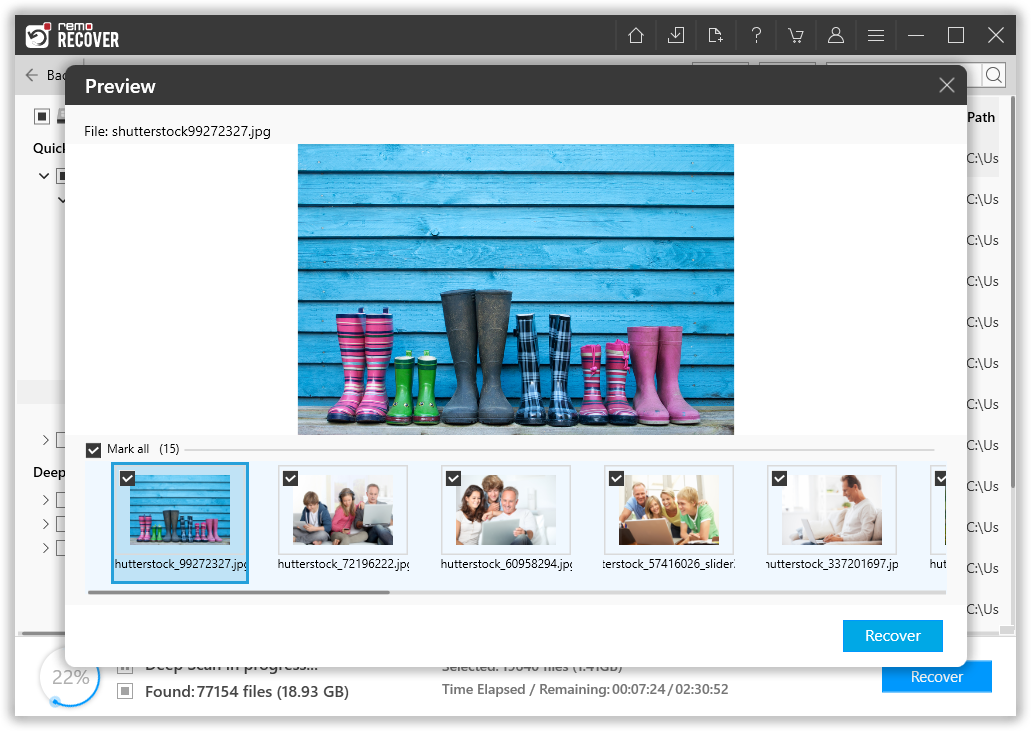
Figure 4: Preview Window
Step 5: Lastly, select a suitable destination path to save the recovered files.
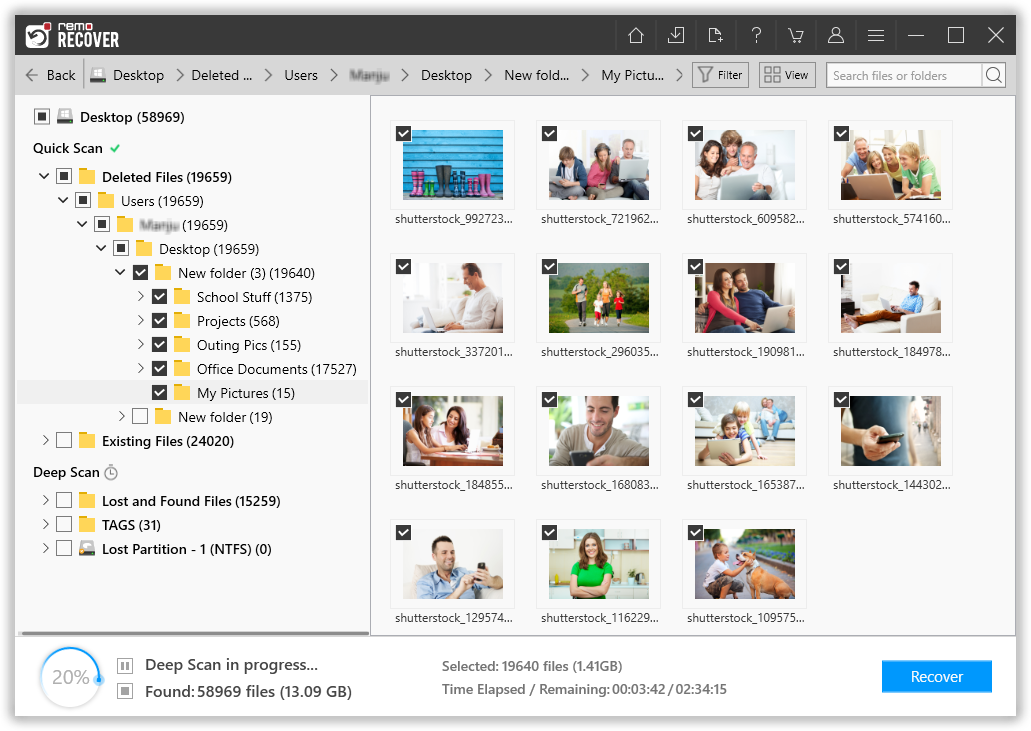
Figure 5: Save Recovered Folders