How Can you Recover Deleted Files on your MacBook?
- A smart tool that recovers deleted files and lost files from MacBook Pro, MacBook Air, MacBook Mini, and iMac
- Fully compatible with all latest editions of Mac OSX
- Supports the restoration of all formats of pictures, videos, music files, documents, PDF files, application files, and so on
- Avails users to evaluate the software by its demo version that recovers and allows users to freely preview the recovered files
- The "Save Recovery Session" feature in the demo version allows users to resume the recovery process and resume the recovery process using the "Open Recovery Session" option
At some occasions, you might experience deletion or loss of files from the MacBook. Sometimes, this scenario ends with a loss of important files like business documents, memorable photos, videos, audio files, etc. In such a condition, it is possible to undelete files using a reliable data recovery software.
Deletion of files and folders from MacBook
On the MacBook, moving a file to the Trash and then emptying the Trash will delete any important items permanently. When you delete a file or folder from MacBook, the entry for that item will be erased from the disk directory. Soon after deleting a file, the data still remains on the disk but the directory shows it as an empty space. As long as you don’t write anything over this space, the deleted files recovery is possible using efficient third-party software like Folder Recovery. Therefore, it is simple to recover deleted files on a MacBook. With the help of this handy application, it turns much easy to recover deleted files and lost files on Mac due to any reasons. Find more tips on lost file recovery at - https://www.folderrecovery.net/lost-on-mac.html.Restore MacBook files easily
The Folder Recovery is an excellent tool to deal with all issues of file/folder deletion from MacBook. It works efficiently on MacBook Pro, MacBook Mini, MacBook Pro, iMac, etc. The highly advanced algorithms implemented in this tool restores all formats of documents, photos, videos, music, etc. effortlessly. It serves useful in the following instances of data loss from the MacBook-
- Emptied Trash folder
- Deletion via Command+Options+Delete
- Formatted volumes
- MacBook volume corruption
- Accidental deletion of files from the Mac Terminal
Irrespective of the causes, the Folder Recovery program instantly undeletes files and folders from the MacBook volumes. This ultimate tool also helps you bring back missing image folder, documents folder, videos folder, songs folders, and so on within a short duration. You can also mention the particular file type in the search box of the application interface that you want to recover from the MacBook.
The Folder Recovery tool is capable to recover deleted files from MacBook with the original content and the file structure. Also, the intuitive software UI guides a user in every stage of the recovery process. This program can be installed on High Sierra, Sierra, El Capitan, Yosemite, Mavericks, Snow Leopard, Leopard, Mountain Lion, Lion, etc. You can also check the working of this utility by running the free demo version of this software.
Furthermore, the Folder Recovery tool for MacBook is also well-suited to work with various removable storage devices- external HDD, USB drives, SSD, iPods, etc. For more information on how to restore folders from USB, visit- https://www.folderrecovery.net/usb.html.
Simple steps to recover deleted files from a MacBook
Step 1: Launch the software and select “Recover Files” option available on the welcome window as shown in Figure 1.
Step 2: Now locate the MacBook volume that is to be scanned for deleted files.
Step 3: Proceed to hit on the Scan button.
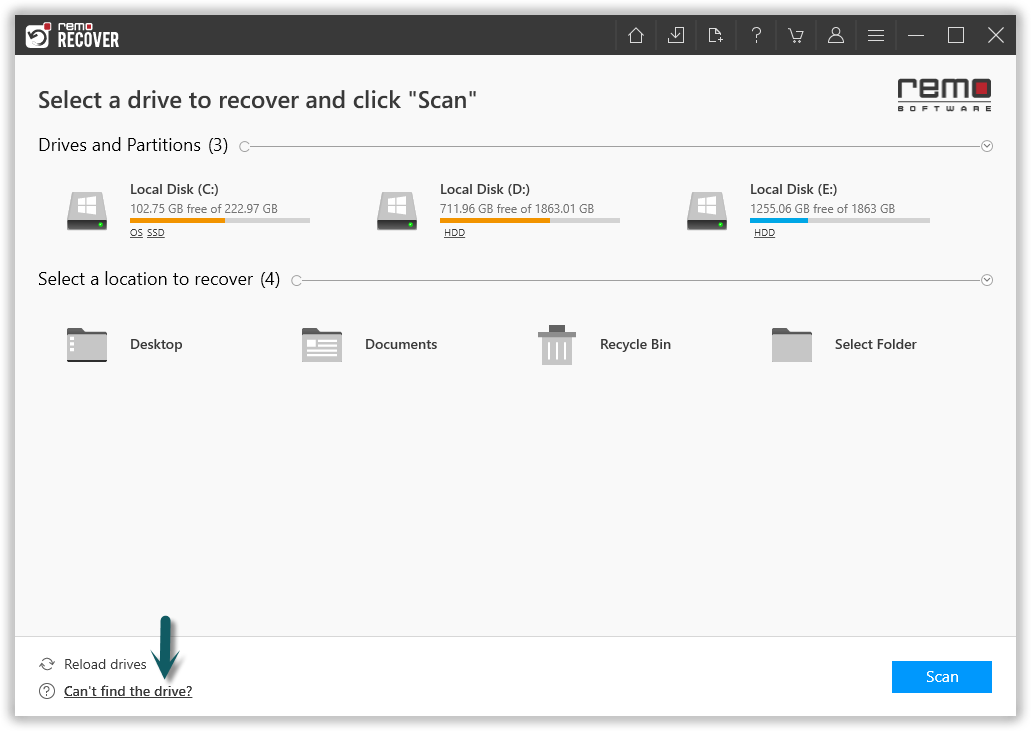
Figure 1: Recover Partitions/Drives
Step 4: The progress of scan appears on a new screen. Wait for the scan process to complete.
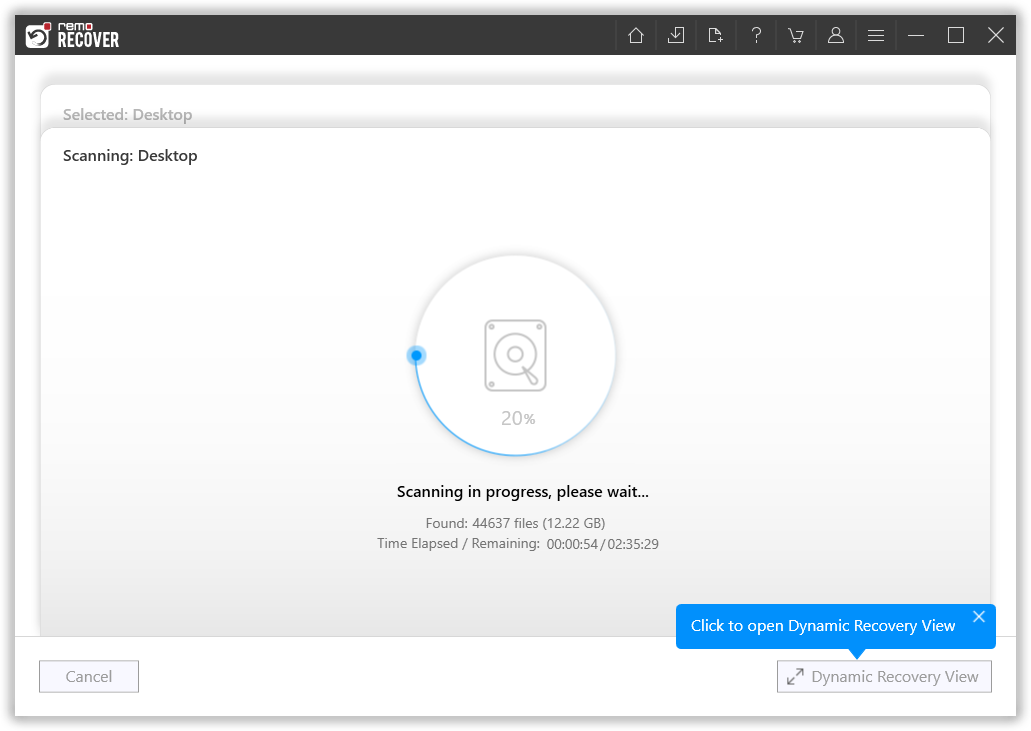
Figure 2: Scanning for Folders
Step 5: Check the scanned results under File Type View and Data View panes.
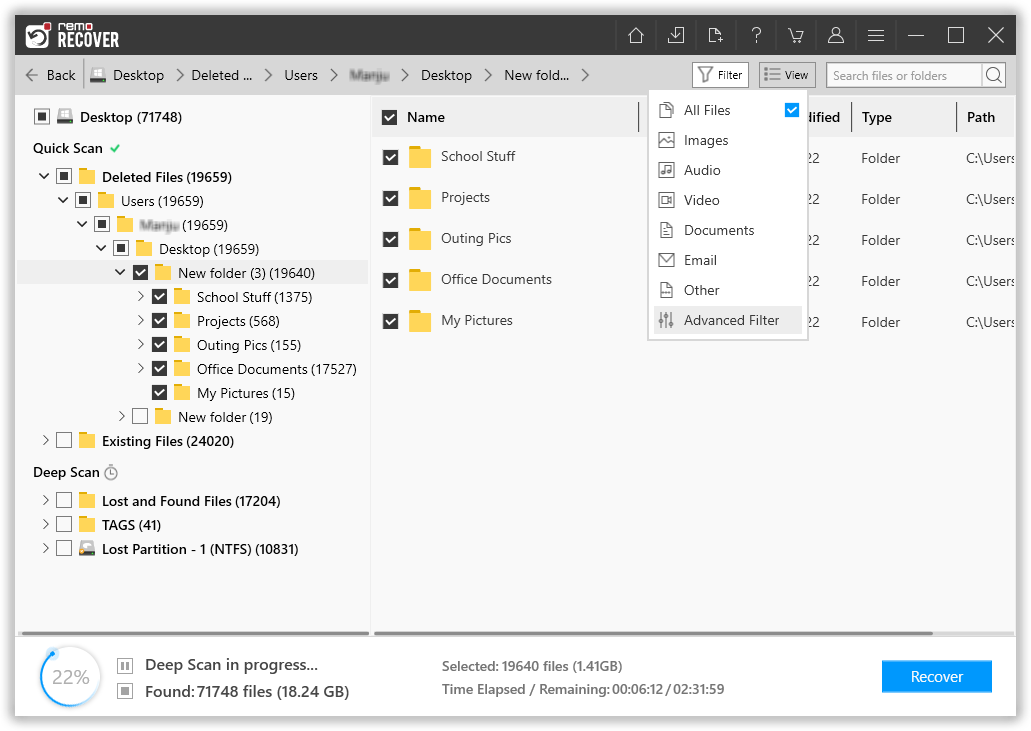
Figure 3: Recovered Folders
Step 5: Preview the recovered file items and tick-mark the files for saving.
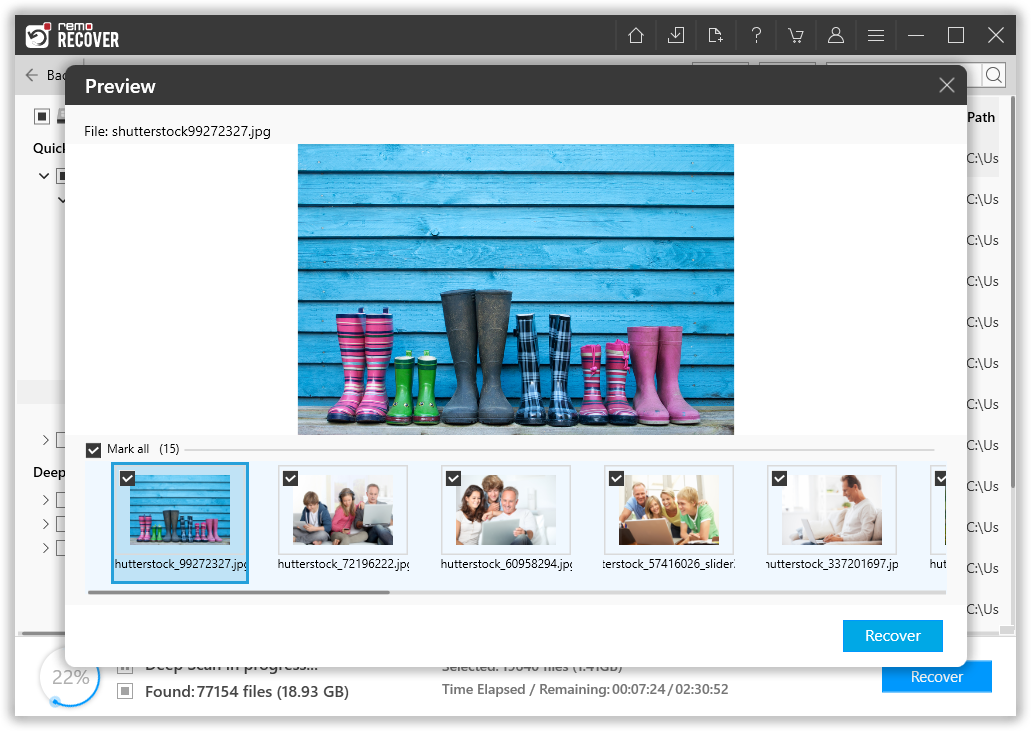
Figure 4: Preview Window
Step 6: Now specify an appropriate folder location to save the files retrieved from the MacBook. Click on the Save button.
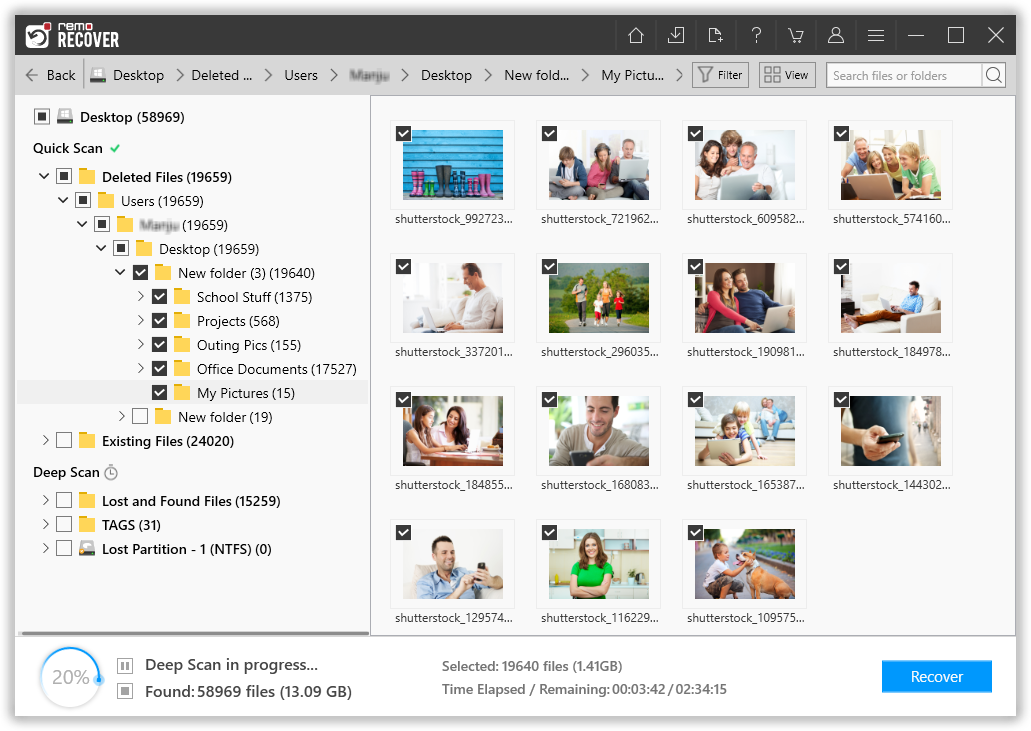
Figure 5: Save Recovered Folders